Posts tagged Tutorials

Scripting database objects in SQL Server 2008

In this article, we would go through the steps to script the objects in a database using SQL Server 2008. This might be required when we need to setup a database similar in structure to your existing database and move the data at a later time. Situations like setting up a new database on another server when performing a side-by-side upgrade or setting up development or training system. The steps explained here serve the task of setting up the initial database and SSIS or other tools can be used to move data.

Let’s take a look at the steps.

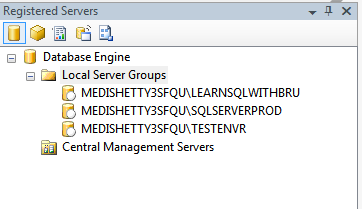
Right click the database which contains the objects to be scripted, from the context menu, choose Tasks and Generate Scripts. (Picture below)

The script wizard dialog box is started and Select Database step is displayed. (Picture below). The database on which we right clicked is selected by default in this step, you can alternately switch to a different database by selecting the database name in the list. I would like to script the reportServer database on my named instance LEARNSQLWITHBRU, hence the database name ReportServer$LEARNSQLWITHBRU. Click Next button to move to the next step.

In this example, I chose Script all objects in the selected database check box at the bottom in order to script all the objects in a sigle step, alternately if you wish to script a selected list of objects, you may want to click next without selecting  the check box.

Since this blog does not cover the other option, I shall give a brief description of what additonal steps would come up at each subsequent steps.

The following step, Choose Scripts Options (picture below) is the next step in the wizard, no matter what option you choose (all objects to script or individual objects). There are several options that you can choose when the objects are scripted. I am using SSMS in SQL 2008 and there are few additional options and changes in default values for few options, when compared to that of SQL 2005. For example, the option Script Indexes is set to True in SQL 2008 where as in SQL 2005 it is false and Script Data and Script Data Compression Options are some of the new options added in SQL 2008.

All of the options are Boolean values and you can change to True or False depending on your choice.  I am changing the Script Data option to True in the picture below.

Click next to continue to the Output Options (picture below). Remember if you have chosen not to script all objects in the database, there are few additional steps that require you to choose the Object types you want to script, and based on the different object types you selected (Schema, Stored Procedures, Tables etc), you get a step for each object type, where you have a choice to select desired objects individually or select all of the objects in that type. After choosing the objects in each object type you would finally come to the next step, Output Option.

There are 3 different destination options you can choose for the output, the default option is the Script to New Query Window when selected, would script the objects and open a new query in the Management Studio and displays the scripts. You can also choose to place the scripts in the clipboard for pasting into a text editor or a separate file that you many have opened, but remember to paste the script as soon as the wizard is completed, since the clipboard contents are not persisted, it may be overwritten if you happen to copy something else into the clipboard.

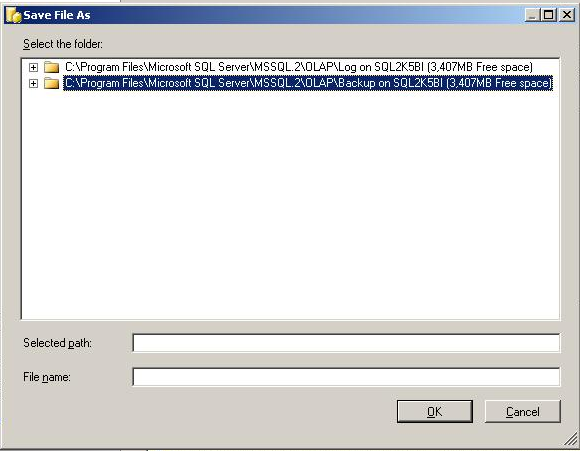
The Script to file option enables us to store the script to a file in the file system and here is another new addition in SQL Server 2008.   You have a choice to store the entire script in single file or each object script in an individual file; Unicode text format is an additional option available to store the scripts and it is the default in SQL Server 2008. Click Next in the dialog box to continue.

All the required input from the user is available and the wizard continues to the next step, it generates the scripts for all the objects of the database and also generates the scripts for indexes, constraints for the tables. In this example since we have chosen to script the data for the tables, the Insert statements will also be generated by the wizard, due to this it may take several minutes depending on the size of the tables. The image displayed below is the wizard at work in generating the Objects.

Once the wizard completes the scripting, a new query window is opened (depending on our choice). The notable enhancement in SQL Server 2008 is that the Insert statements are also generated as script, which is readily available to run.

One important point to be noted is that this feature is available when the Management Studio is SQL Server 2008 and it does not necessarily need that the database we are scripting should also be of SQL Server 2008. For this demonstration, I used a SQL Server 2005 database scripted using SSMS 2008.

Performing SSAS Database Backup

In this article you will learn the steps to backup a SQL Server Analysis Server Database.

After logging to the Analysis Services, in the object explorer, select the database that needs to be backed up. Right click the database and from the pop-up menu choose Backup.

Backup database dialog is displayed which is similar to many windows based dialog boxes. It displays the database that we are going to backup. In the text box against backup file, type in the filename that you intend to place the backup in. The backup file extension for an SSAS database is by default “.abf” (which in my opinion stands for Analysis Services Backup file (or format). There are some options to choose from if required. Options such as Allow file overwrite will overwrite the existing file (if there exists a file with the same name at the same location).  You can additionally compress the backup file while reduces the backup file size and protect the backup file by providing a password. That password needs to be given while restoring a database from the same backup file.

Click OK to continue to backup the database.

The backup is performed and the screen similar to the one shown below is displayed as long as the database backup is being performed. The Progress section of the dialog (left bottom of the dialog box) displays Executing.

Note that after the backup is done successfully, it does not display a message box about the successful completion of the backup. You need to check for the existence of the backup file at the destination location.

– Bru Medishetty

Querying Multiple Servers in SQL Server 2008

SQL Server 2008 provides the functionality of querying multiple Servers from a single query window. This is helpful for tasks like retrieving server information such as Version, Edition, Instance Name, logins available across each instance, databases on the servers etc.

In order to query multiple servers the only prerequisite is that the servers need to be registered prior to run the query and of course, there should be a valid login to connect to those Server. The SQL Servers can be of other version such as SQL 2000 or 2005. In this example I have two SQL Server 2005 instances and one SQL Server 2008 instance all of them are installed on a single Machine.

For the purpose of this article, I assume you know how to register a SQL Server in the Local Server Groups. Open registered servers from View menu or using keyboard short-cut Ctrl + Alt+ G (picture below).


Right click on the server group, from the pop up menu choose New Query as shown in the picture below.


A new query editor is opened which has is simalar to a normal new query editor. The only difference you find is the status bar down at the the bottom of the query editor. The picture below displays the status bar and we see the difference with a usual query editor status bar. This status bar does not a single instance name rather, displays the Server Group Name, also SPID information is not displayed.


I am running a simple query to retrieve the list of the user Databases on all the instances in the server group. The query results is displayed along with the query. The Database names are displayed along with SQL Instance name.


Those of us who would like to find the backup information of the critical databases or to find the SQL Agent Jobs that failed across several instance, that can all be done from a single query in SQL Server 2008.

–Bru Medishetty


Installing .NET 3.5 Framework in Windows Server 2008 R2

This article will guide through the steps to install .NET Framework 3.5 on a Windows Server 2008 R2.

I recently installed and started working on a Windows Server 2008 R2 Enterprise. I started installing SQL Server and I knew SQL Server 2008 requires the Microsoft .NET Framework 3.5 to be installed on the machine. The installation wizard displayed the following message box (picture below), which is common. (as I had previously installed SQL Server 2008).

I clicked OK button and the setup started loading the required components and immediately displayed the error message (picture below) , asking to install .NET Framework from Role Management Tool

To install roles on a Windows Server the roles have to be added in the Server Manager. So I opened the Roles node from the tree structure in the Server Manager and what you see below is what it looks like (only required portion of the screen is shown to make the images smaller and tidy). On the right side, Add Roles is available and we need to select / click that.

Upon selecting Add Roles, the Add Roles Wizard is displayed as shown below. I selected Application Server and on selecting it, there is a description available on the right side, what that role is going to provide or include.


The following information message box is displayed informing that to install an Application Server, there are certain other required features we need to include. All we need to do is to click the Add required features button in the message box.

It would then display the dialog box giving a short information of what an Application Server does. Click Next to continue.

I choose some additional roles apart from Application Server role, and the dialog box below is a confirmation of all the selections, click install to start the installation process.

The Installation begins. (Picture Below)

The installation is successful and the picture below is the dialog box confirming the success of the installation of the roles that we have chosen.

With that, the prerequisite for installing a SQL Server 2008 Instance is met, and we can continue installing SQL Server 2008.

–Bru Medishetty

Linked Server with Access 2007 Database

This article will explain the steps to create and using a Linked Server on an Access 2007 Database. The steps include creating a Linked Server using GUI and through T-SQL script.

The picture below displays location of the 2 Access Databases (My Documents directory) used in this exercise.

To create a Linked Server using the New Linked Server dialogs, start at the Server Objects in the Object Explorer in SSMS. Expand Server objects and on the Linked Servers, right click and select New Linked Server. (Picture below)

In the New Linked Server dialog box, type the linked server name that you would like to create and use (It is
not a must to have the actual name of the Access database, in the example we are naming
LINKEDSERVER_ACCESS
. For Server type, choose Other data source, and for Provider from the drop down
list, choose Microsoft Office 12.0 Access Database Engine OLE DB Provider.

For the Product Name, type ACCESS and for the data source give the location where the access database is located. (Picture below)

After entering above mentioned details, select the Security Page in the left hand pane of the dialog box. In the security settings choose the option Be made using the login’s current security context. Click Ok and the Linked Server is created.

The picture below displays the query to update a table and select statement to retrieve the table data.

Alternately you can add a linked server using the system stored procedure sp_addlinkedserver in the Master DB. The picture below shows the parameters for the stored procedure such as servername, srvproduct, provider and the datasource. After adding the Linked Server, the next query is a select statement to select few records from the newly created Linked Server.


–Bru Medishetty