Installing .NET 3.5 Framework in Windows Server 2008 R2

This article will guide through the steps to install .NET Framework 3.5 on a Windows Server 2008 R2.

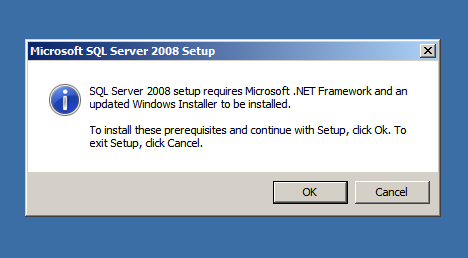
I recently installed and started working on a Windows Server 2008 R2 Enterprise. I started installing SQL Server and I knew SQL Server 2008 requires the Microsoft .NET Framework 3.5 to be installed on the machine. The installation wizard displayed the following message box (picture below), which is common. (as I had previously installed SQL Server 2008).

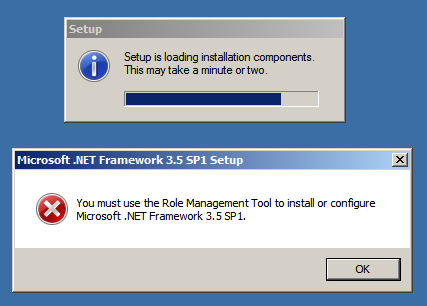
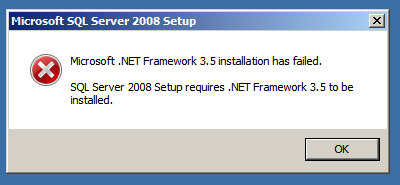
I clicked OK button and the setup started loading the required components and immediately displayed the error message (picture below), asking to install .NET Framework from Role Management Tool.

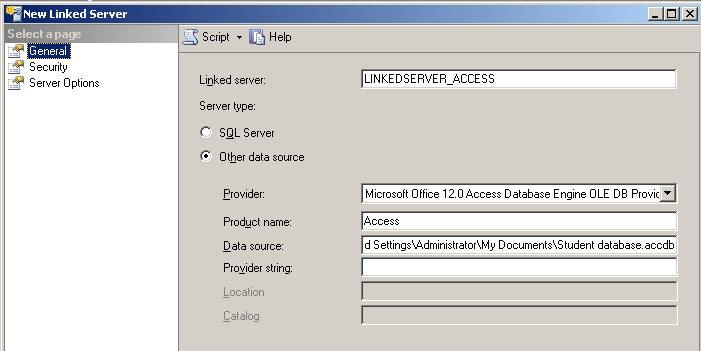
To install roles on a Windows Server the roles have to be added in the Server Manager. So I opened the Roles node from the tree structure in the Server Manager and what you see below is what it looks like (only required portion of the screen is shown to make the images smaller and tidy). On the right side, Add Roles is available and we need to select / click that.

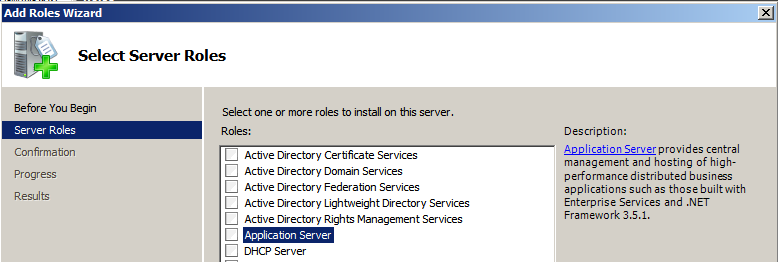
Upon selecting Add Roles, the Add Roles Wizard is displayed as shown below. I selected Application Server and on selecting it, there is a description available on the right side, what that role is going to provide or include.

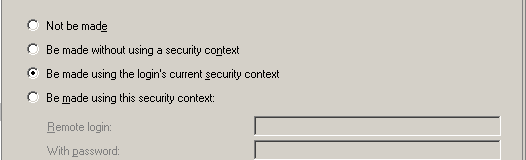
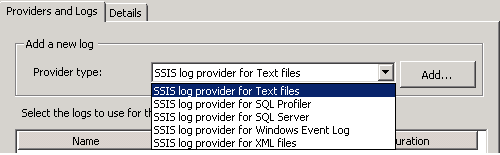
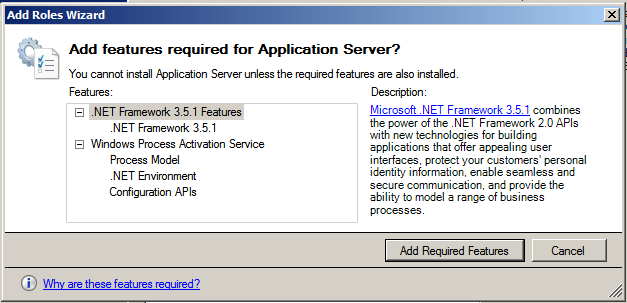
The following information message box is displayed informing that to install an Application Server, there are certain other required features we need to include. All we need to do is to click the Add required features button in the message box.

It would then display the dialog box giving a short information of what an Application Server does. Click Next to continue.

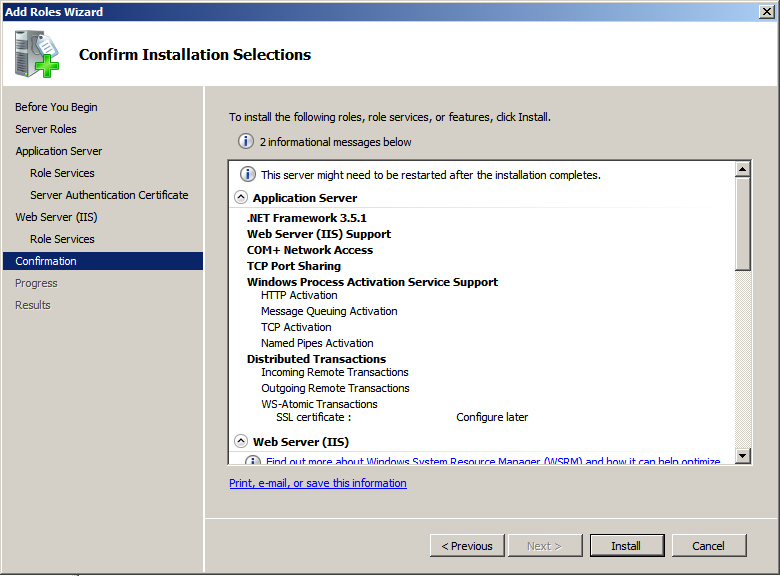
I choose some additional roles apart from Application Server role, and the dialog box below is a confirmation of all the selections, click install to start the installation process.

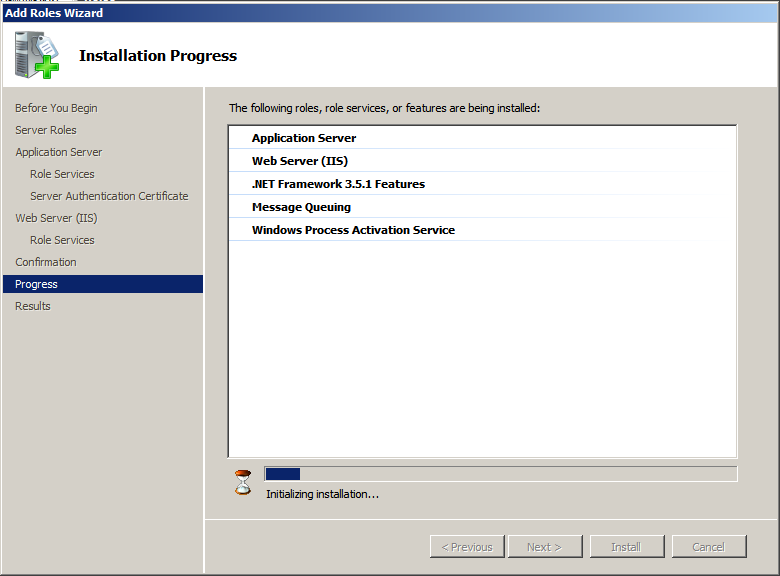
The Installation begins. (Picture Below)

The installation is successful and the picture below is the dialog box confirming the success of the installation of the roles that we have chosen.

With that, the prerequisite for installing a SQL Server 2008 Instance is met, and we can continue installing SQL Server 2008.

Do you like this site? Like our FB page @ Facebook.com\LearnSQLWithBru that let’s you know when there is a new blog post.

–Bru Medishetty

Linked Server with Access 2007 Database

This article will explain the steps to create and using a Linked Server on an Access 2007 Database. The steps include creating a Linked Server using GUI and through T-SQL script.

The picture below displays location of the 2 Access Databases (My Documents directory) used in this exercise.

To create a Linked Server using the New Linked Server dialogs, start at the Server Objects in the Object Explorer in SSMS. Expand Server objects and on the Linked Servers, right click and select New Linked Server. (Picture below)

In the New Linked Server dialog box, type the linked server name that you would like to create and use (It is
not a must to have the actual name of the Access database, in the example we are naming
LINKEDSERVER_ACCESS
. For Server type, choose Other data source, and for Provider from the drop down
list, choose Microsoft Office 12.0 Access Database Engine OLE DB Provider.

For the Product Name, type ACCESS and for the data source give the location where the access database is located. (Picture below)

After entering above mentioned details, select the Security Page in the left hand pane of the dialog box. In the security settings choose the option Be made using the login’s current security context. Click Ok and the Linked Server is created.

The picture below displays the query to update a table and select statement to retrieve the table data.

Alternately you can add a linked server using the system stored procedure sp_addlinkedserver in the Master DB. The picture below shows the parameters for the stored procedure such as servername, srvproduct, provider and the datasource. After adding the Linked Server, the next query is a select statement to select few records from the newly created Linked Server.

 Do you like this site? Like our FB page @ Facebook.com\LearnSQLWithBru that let’s you know when there is a new blog post.

–Bru Medishetty

Configure logging in SSIS packages

In this article we will look at the steps to enable logging in SSIS packages. Each control flow task in a package have multiple events  and logging enables you to look the execution details of these events.

Steps to configure logging

Open the package in Business Intelligence Development Studio (BIDS), see that you are in the design mode. When you are in the Control Flow, right click (do not right click on the control flow tasks) and select Logging from the drop menu displayed (picture below).

A dialog box Configure SSIS Logs is displayed. In the left hand pane, there is a tree view is displayed. Select the package by selecting the check box corresponding to it (picture below). You can check individual tasks also.

Upon selecting the package or task, you can then configure logging through the available logging providers from the drop down list as shown below. You can add multiple logs of the same type and/or another type. In our example we will look at selecting only one log provider and that is SSIS log provider for Text Files. After selecting the log provider, click on Add button.

Once the Log type is selected and added, the dialog box looks like the picture below. Choose the log file by selecting the check box to the left of it and go to configuration column to configure the location of the log file in our example it is a text file.

There would be a drop down list when you go to the configuration column, under which you would get a <new connection> listed, choose that and it will open a small window which would be similar to the one shown below.

Choose create file in the usage type and click browse button.. It would open a dialog box and we need to navigate to the directory where the SSIS package log file will be created. I am choosing the default Log directory of that instance here. (picture below) 

After choosing the location and the name of the file to be used, select Open button in the current dialog box that would take back to the previous dialog, select OK to configure the file location. Now we are all set, except the events that would be logging into this log file. To select the events, switch to the details tab as show below. Choose the events which needs to be logged into the log file. Choosing the events selectively is important, since we do not want too much of information is written into the log file, making it difficult to find information when needed. I always choose OnError and OnTaskFailed events for every task and some additional events in case of Data Flow tasks.

Continue to click a series of OK buttons to have the logging configured.

Do you like this site? Like our FB page @ Facebook.com\LearnSQLWithBru so that, you know when there is a new blog post.

–Bru Medishetty