
You can install sample Databases when Installing SQL Server Instance, if that was not done, you need to install Sample Databases separately.
In this blog, we will look at the steps in doing that.
As the first step, download the Sample Database that would like to install, I chose AdventureWorks for SQL 2005 in this example.
You can follow this link to download the Sample Databases
Remember the path you downloaded the file to.
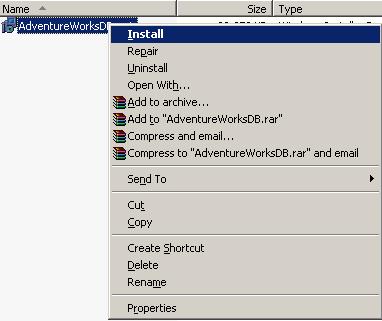
Browse the directory where you have downloaded the file, select the .msi file , right click and choose Install. (Picture Below)
The Installation process starts and we will look at each of those steps.
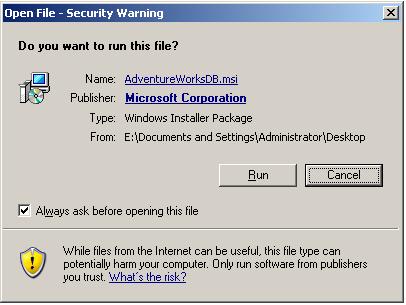
If the Security warning Dialog Box appears, choose Run. (Picture Below)
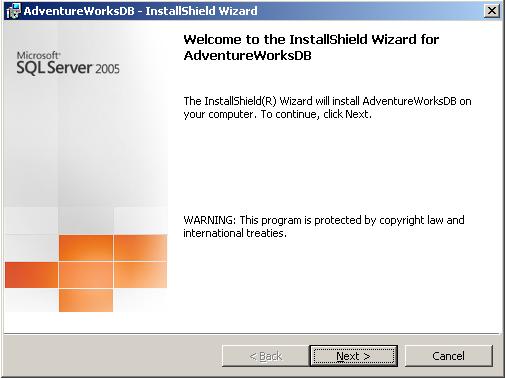
The welcome screen for the Installation Wizard is displayed, click Next. (Picture Below)
In the License Agreement Dialog, Choose I accept the terms to continue.

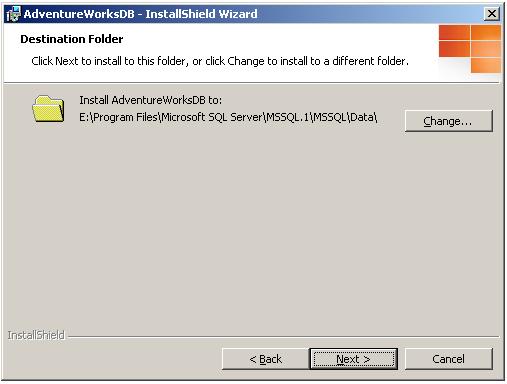
The Next Screen displays, the Destination Directory where the Sample Database would be installed to.
By default it will be Data Directory of SQL Server. Click Next to continue and Install in the default Directory.
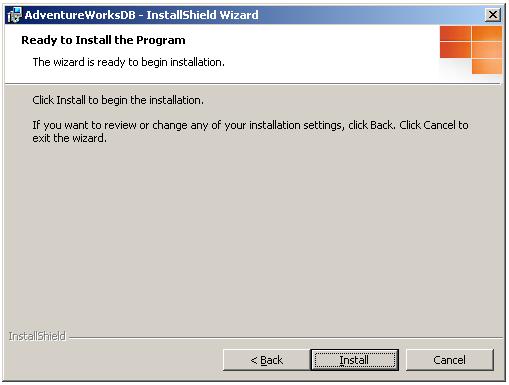
Click Install to begin the Installation.
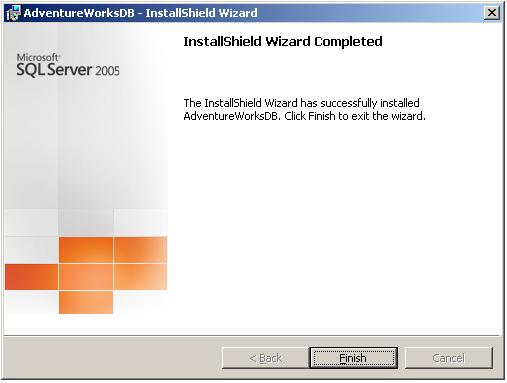
When the Installation is completed, the below shown dialog Box is displayed and click Finish to complete the Installation.
Once you finish this step, you can check whether the Sample Database is installed by going to the Data Directory of your SQL Instance.
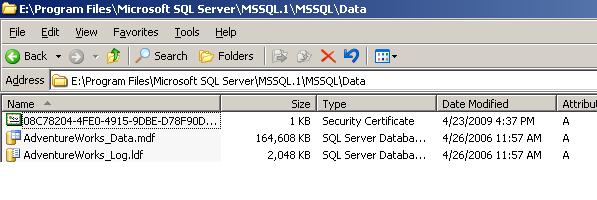
Both the Data and Log files are placed in the Data Directory of the SQL Server Instance by the installation that we performed.
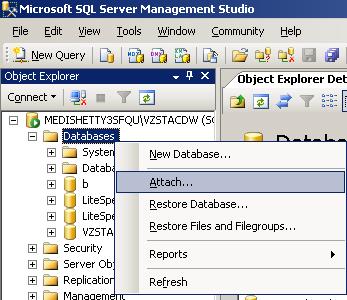
Once this part is done, the next thing we have to do is open SQL Server Management Studio (SSMS). In the Object Explorer, Right click on the Databases Node and select Attach.
The attach databases dialog box appears and click Add Button.
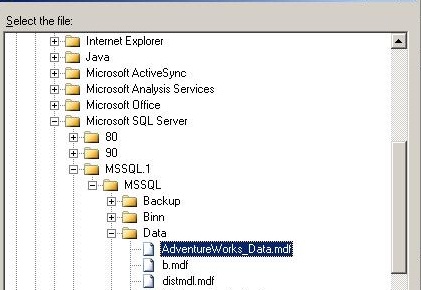
When you click the Add button, there will be a window that requires us to locate the .MDF File. By default, it opens the Data Directory of the SQL Instance, so if the AdventureWorks Database Data File (.MDF) is available, select that .MDF File.
After the MDF file is chosen click OK, it will show the Attach Databases dialog box with the details of the MDF file and also the details of all the Database files (Both Data and Log)

Click OK to complete the attaching the Database.
Now you should be able to see the Database in the Databases Node in Object Explorer.
Do you like this site? Like our FB page @ Facebook.com\LearnSQLWithBru to know when there is new content.
— Bru Medishetty