In this blog post we shall learn how to attach a database when the Database Log file is missing. Attaching a database which has all both the data and log files intact, is quite straight forward, you show where the data and log files are residing on your machine and the database will be attached. But when the log file is missing there is a little change to that procedure..
For this example, I downloaded the sample database for SQL Server 2012 from the Microsoft official site for SQL Server sample databases. First lets us place the Primary Data file (.mdf) file in the Data directory of the SQL instance, so I copy the data file (pic below) and paste it in the Data Directory (it might be different on your Server).
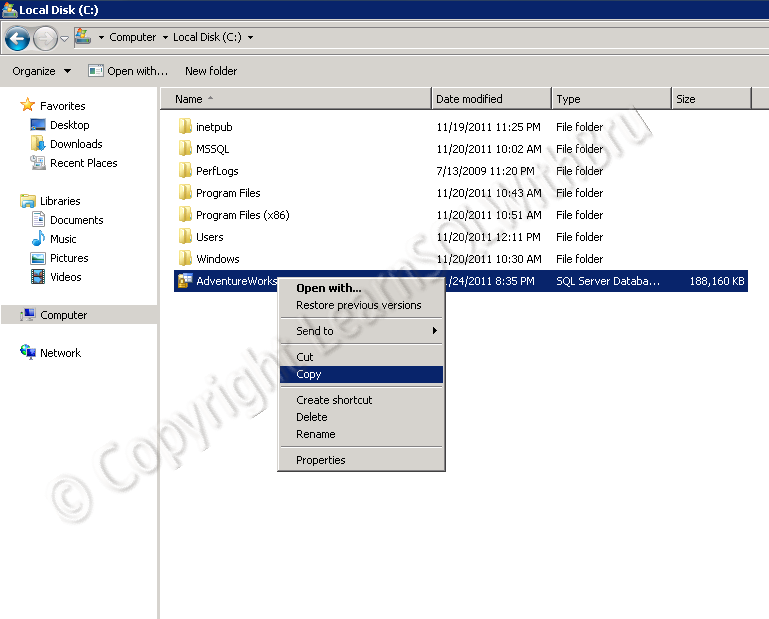 The picture below is my Data directory. The reason for placing the mdf file in the data directory is simple, when you try to attach a database, the wizard by default opens the data directory of the SQL Instance. You might also have the mdf file elsewhere, but in the wizard you will have to browse to that location..
 Open the SQL Server Management Studio and connect to the SQL Instance, in the Object Explorer, right click the Databases node and select Attach from the popup menu.
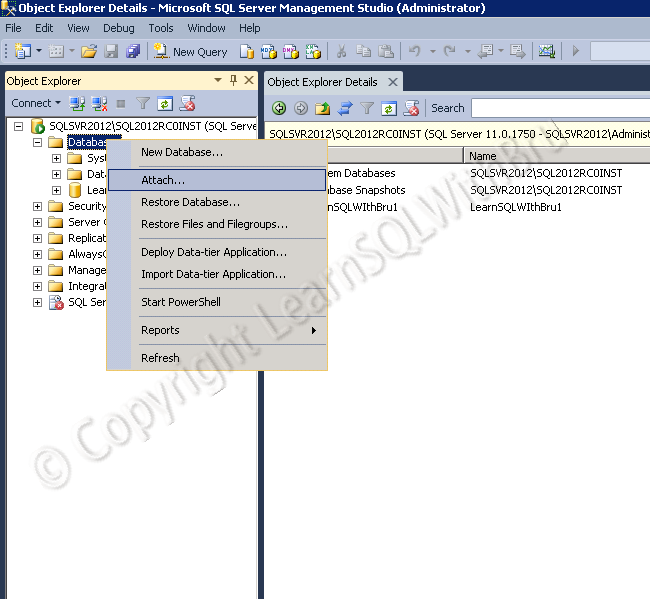 Attach databases wizard is displayed as shown below. Click on Add button..
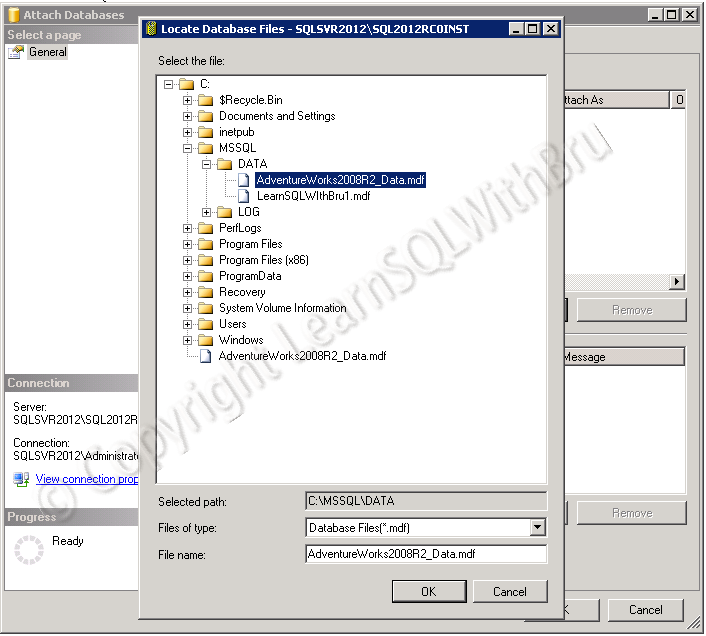
 Then the below screen appears where we have to choose the mdf file of the database that we are planning to attach. As mentioned earlier, this locate database files dialog by defaults shows the Data directory of the Instance. If your mdf file is in a different location, you need to expand the folder tree to locate the file. Once the file is located, select the file and click OK button.
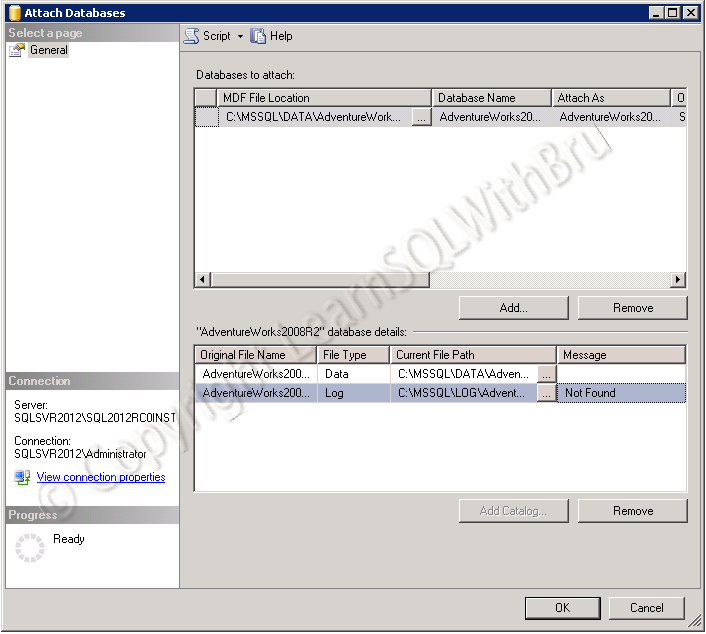
 The wizard will then display the details of the database being attached, and note that the wizard is expecting a Log file (.ldf) in the log directory of the SQL Instance. Since it did not find any file in that directory the Message is displayed as Not Found. In the bottom portion of the window, select the row that displays the info about the log file. Click Remove button in the bottom right of the window.
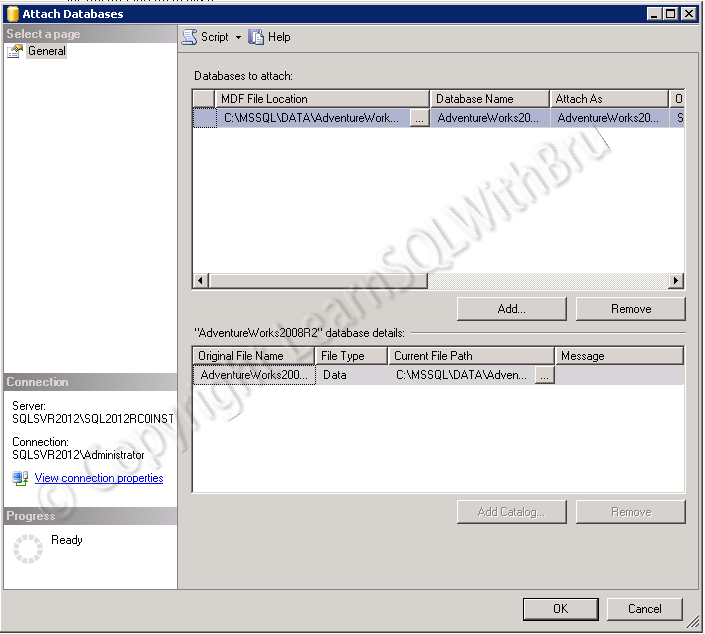
 After you removed the row, the window should look like the one shown in the pic below. Now click OK to attach and create the database.
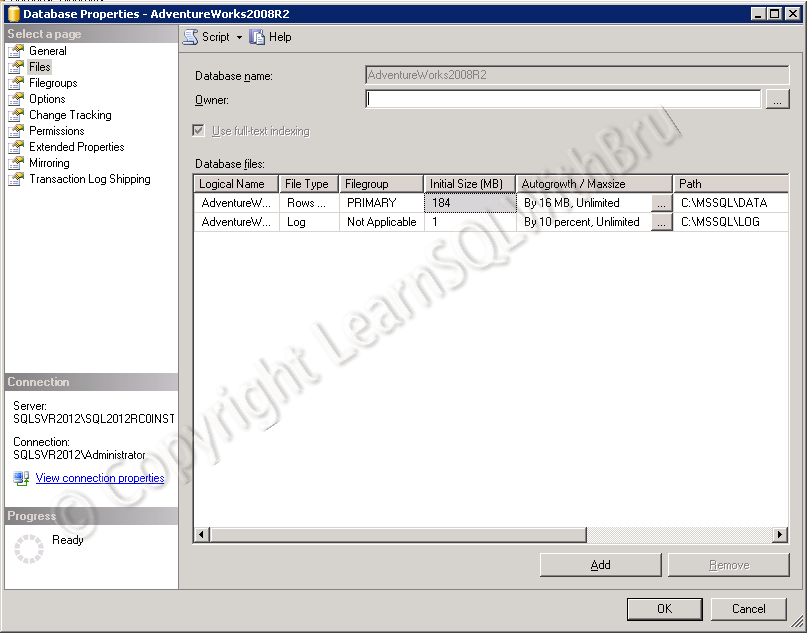
 Once the database is attached, right click the database and choose Properties and you click the Files page on the left side. You should see the database file of the database that was attached. See that the Log file is created with default database settings.
Do you like this site? Like our FB page @ Facebook.com\LearnSQLWithBru so that, you know when there is a new blog post.
— Bru Medishetty

