Create Linked Server to connect to another SQL Server Part – I

This is the first blog in a 2 part series on how to create Linked Server to connect to another SQL Server (Instance) and run queries using the created Linked Server. These 2 blogs will give you step by step instructions to create Linked Server on SQL Server 2012 using Graphical User Interface and T-SQL.  

Using graphical user Interface in SSMS

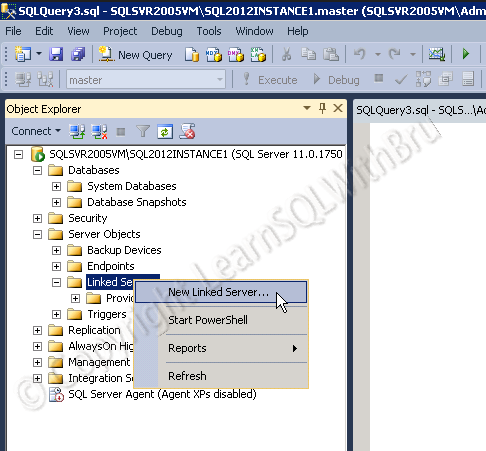
First we will look at the steps to create a Linked Server the easy way.  In Object Explorer , expand the tree view of the SQL Server, expand Server Objects and Right Click on Linked Servers and choose New Linked Server… from the pop-up menu (as shown below)

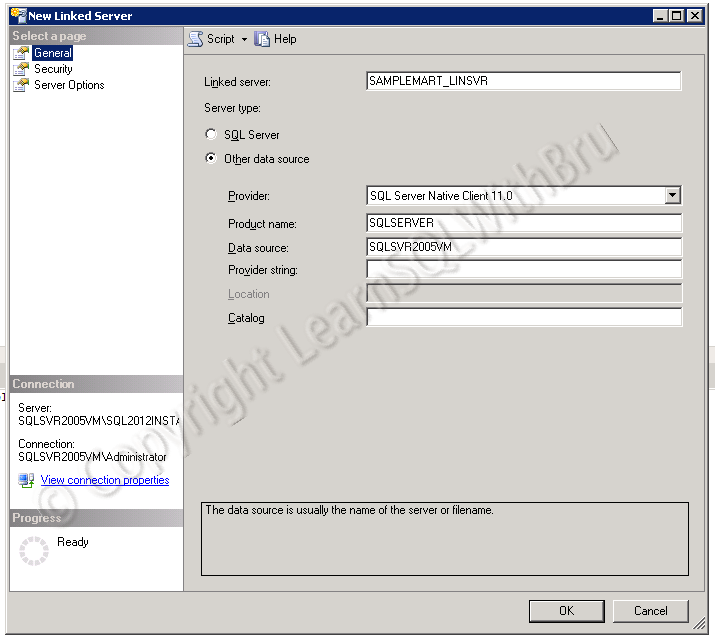
Then a dialog box is displayed, by default the General Page is displayed, where we can enter the name of the Linked Server that we are about to create in the Text box corresponding to Linked Server : In this example I am creating a  Linked Server with name as SAMPLEMART_LINSVR. 

Then, under Server type, choose Other data source option, (in the next blog we shall see when to choose SQL Server option) . From the drop down list corresponding to Provider, choose SQL Server Native Client 11.0.

Note: If you care creating a Linked Server to connect to another SQL Server in SQL Server 2008, then choose SQL Server Native Client 10.0, apart from that the rest everything is similar to what you see in this blog..

For Product name, enter SQLServer, for Data Source enter the name of the SQL Server Instance (the remote SQL Instance to which you want to connect), if the remote instance is a named instance, then enter the complete server name as machinename\instancename.

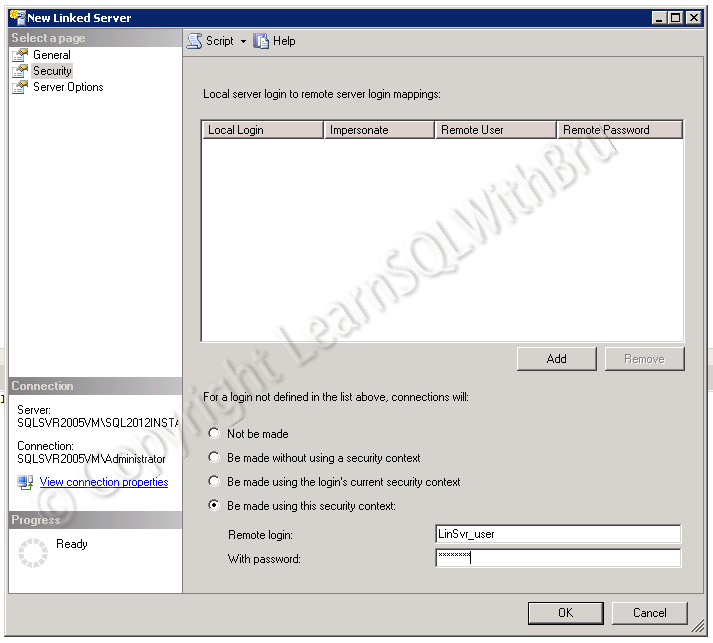
Next, select the Security page in the left side pane. Choose the last option Be made using this security context and enter the SQL Login Username and Password. This username with that password must exist on the remote server, prior to you using it here.

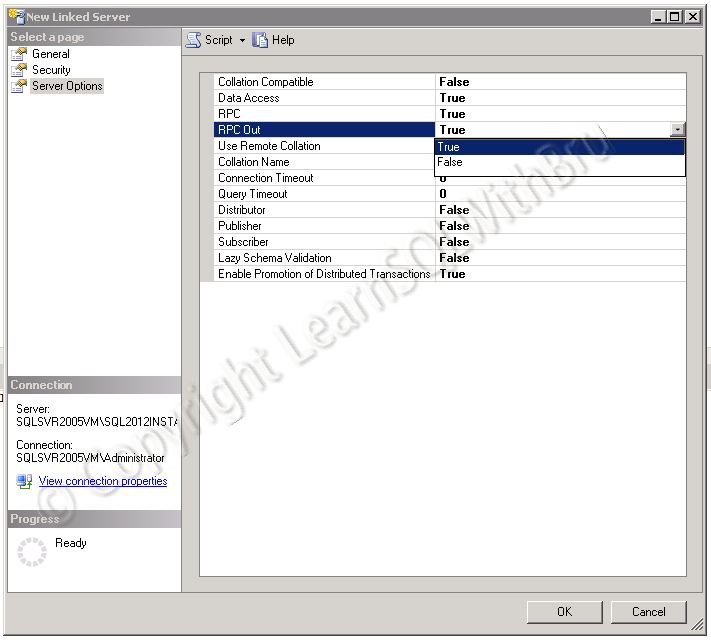
Next, select Server Options page. Choose appropriate value for the server options, in most cases the values are True or False which indicates whether the Linked Server being created should have that appropriate setting enabled or not. As an example, for Data Access, I selected True, indicating that we would like to access the data on the remote server using the Linked Server. If you would like to create a Linked Server now and do not want to access data using the Linked Server, you can choose False and then when the need arises to access data on the remote server, you can choose True.

Note that you can modify all of the options at a later time after the Linked Server is created. Once your selections are done, click OK to create the Linked Server.

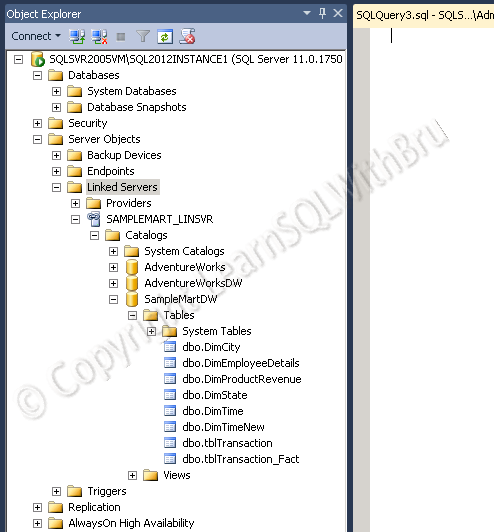
If you do not see any error message, then your task of creating Linked Server was successful. You can find if it was created successfully by expanding the Linked Server node in Object Explorer and expanding the newly created Linked Server. You should be able to see the databases and also able to expand those databases and see the tables, etc (as shown below)

Querying data using a linked server

Now that we have created a linked server, we shall see how to query the data using the linked server. There are 2 ways we can query using a linked server; In this blog we are going to look at the easiest way to query a linked server.

Using 4 part Notation

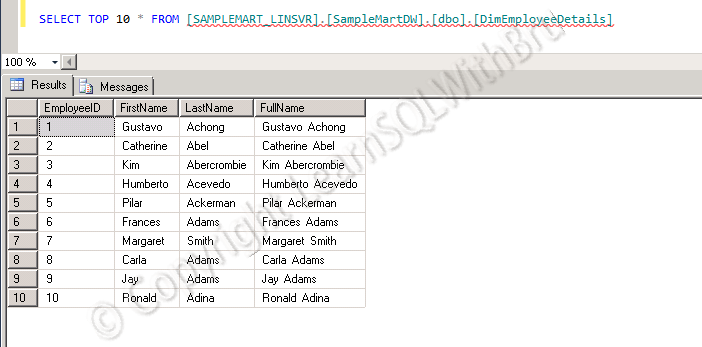
When querying a table using linked server, it is easier to query with a 4 part notation which is LinkedServer.Database.Schema.Objectname. In a normal queries we usually use a 2 part notation as schema.objectname such as dbo.Employee. While querying data using a linked server we would have to prefix LinkedServer.databasename to the 2 part notation. Hence in the below query, I am including the Linked Server name SAMPLEMART_LINSVR followed by the database name (SampleMartDW) followed by schema (dbo) and table name DimEmployeeDetails..

Though this way of querying a linked server is easier, the queries will be slower when compared to the other way of querying a Linked Server.

You can read the 2nd part of this blog here @ Create Linked Server to connect to a SQL Server Part – II.

Do you like this site? Like our FB page @ Facebook.com\LearnSQLWithBru so that, you know when there is a new blog post.

— Bru Medishetty

Introduction to Backup Compression in SQL Server – Video

In this session we are going to learn about Backup Compression in SQL Server, which is introduced in SQL Server 2008.

SQL Server 2008 introduced a feature called Backup compression where you can compress your backups while performing a backup without any 3rd party tools. And in SQL Server 2008, this feature was available only in Enterprise Edition, and was not supported in any other versions, so you cannot compress a backup using any of the other Editions in SQL Server 2008. Starting from SQL Server 2008 R2, this feature is available in Standard Edition, Enterprise Edition, Datacenter Edition. (apart from Developer and Enterprise Evaluation Editions which has same features as Enterprise Edition). So this feature is expanded to 2 other versions in SQL Server 2008 R2.

YouTube Preview Image

What happens with backup compression? Watch the video for more details….

Do you like this site? Like our FB page @ Facebook.com\LearnSQLWithBru so that, you know when there is a new blog post.

— Bru Medishetty
 

Installing SQL Server 2008 Service Pack 3 on Multiple Instances

This blog will provide a step by step details of installing SQL Server 2008 Service Pack 3 on more than 1 Instance at the same time. Before going ahead and installing Service Pack, I would recommend you read one of my earlier blogs Best Practices for applying SQL Server Service Packs.

In one of my previous blogs (read it here), you can find where to download the Service Pack, what are the enhancements to SQL Server and few useful links that would assist you in preparation to applying Service Pack 3 for SQL Server 2008. 

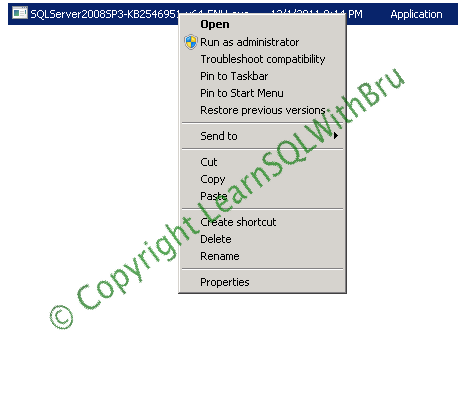
Once you have downloaded the Service Pack 3, copy the .exe file to a local drive and right click on the file and choose Open from the popup menu to begin the installation. (You can alternately double click the file to begin the installation).

The exe file take a min or two (depending on your system) and extracts to a temporary location, once the extraction is completed, the below Welcome screen is displayed and the installer performs few checks and displays the below screen. If there are any failures, ensure that the necessary steps are performed. Click Next to continue installation.

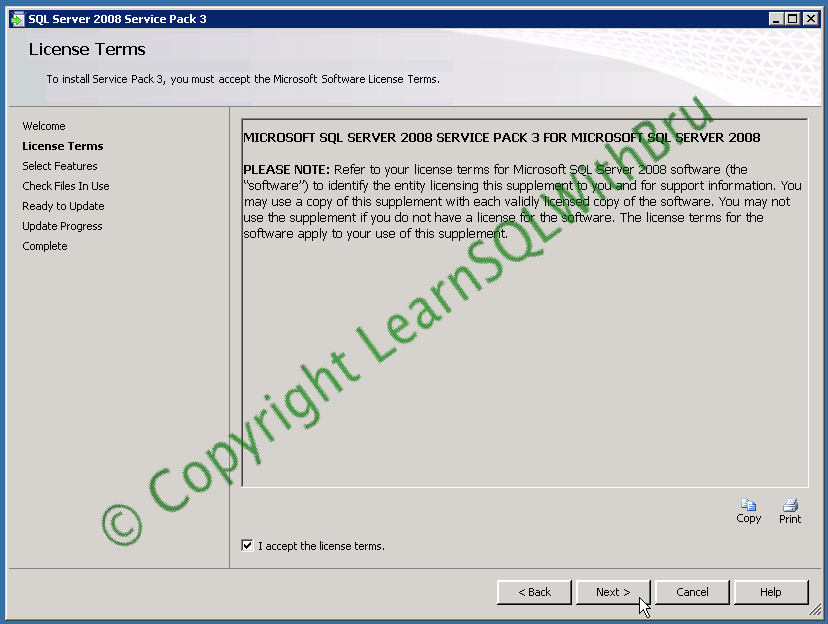
Accept the license terms by selecting the check box and click Next to proceed.

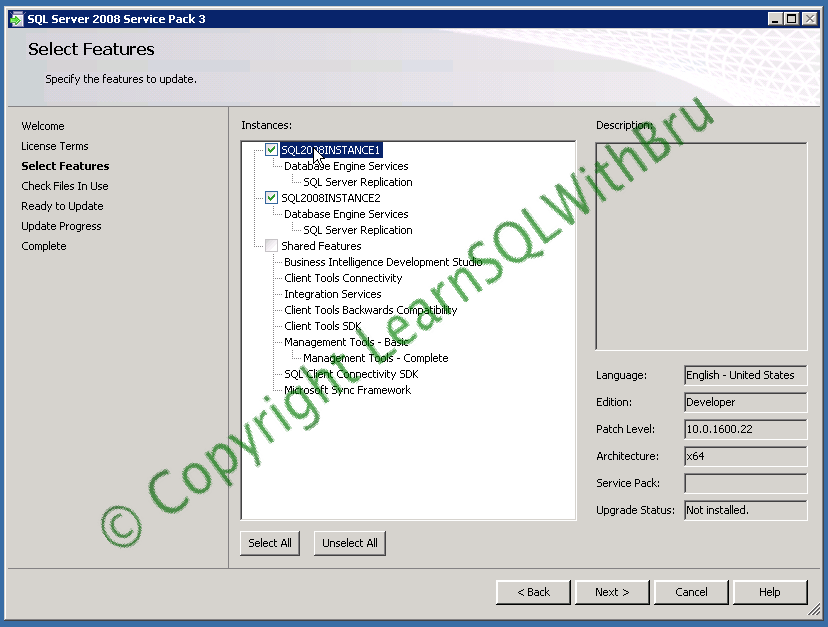
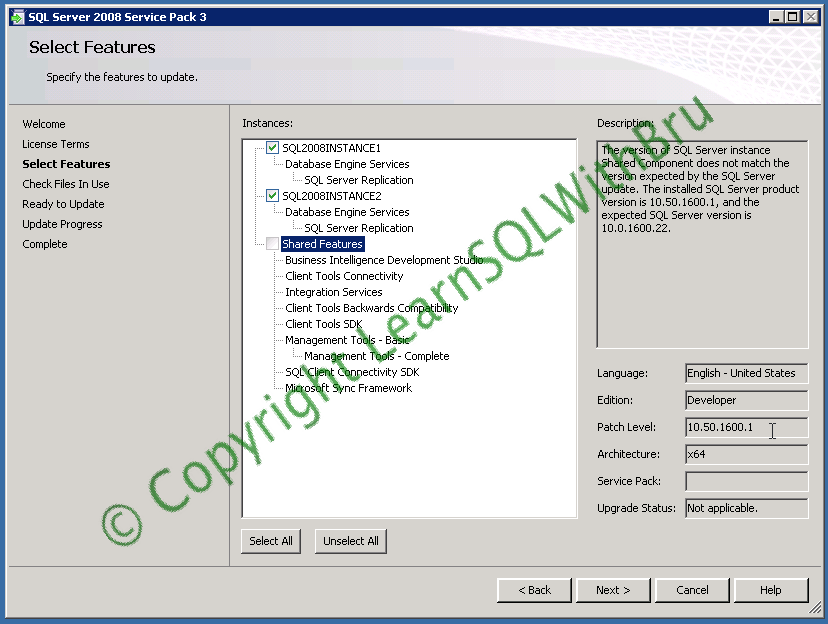
The next step is features selection, where you have to choose the components to which you would like to apply the Service Pack 3. In this blog we are going to apply SP3 for 2 instances at the same time. If you have more than 1 SQL 2008 Instance on the machine, you can choose which instance(s) to apply Service Pack. You can select the check boxes beside each of the Instances or if you wish to Install for all Instances / features click Select All button in the bottom left.

You can click on the Instance to see the current details of that Instance / feature. In the picture below, I clicked on the SQL2008INSTANCE1 and the Edition, Patch Level and other details are displayed..

The machine on which we are working in this blog, has a SQL Server 2008 R2 instance installed. Due to this, the Shared Features of SQL Server 2008 are all upgraded when the R2 instance is installed, because of this, we cannot select the Shared Features and apply SP3 to shared features. (see pic below and the description, in the right)

Click Next after you are done selecting the features to be applied with SP3.

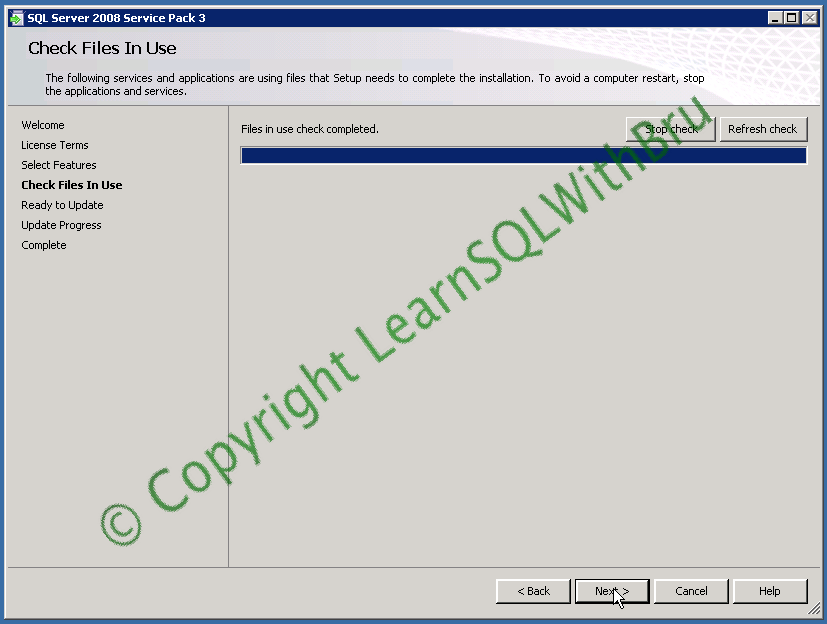
The next step check for the files / services that are being used currently and lists if there are any files that needs to be stopped in order to avoid a restart. 

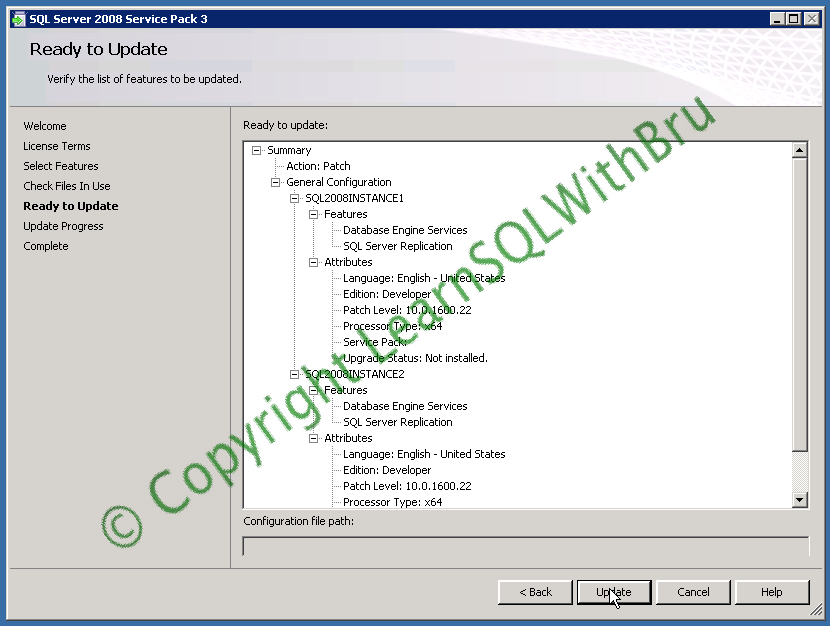
Click Next to proceed. Then the below screen is displayed which shows a summary of features that are going to be updated to Service Pack 3. Click Update to start the SP 3 installation.

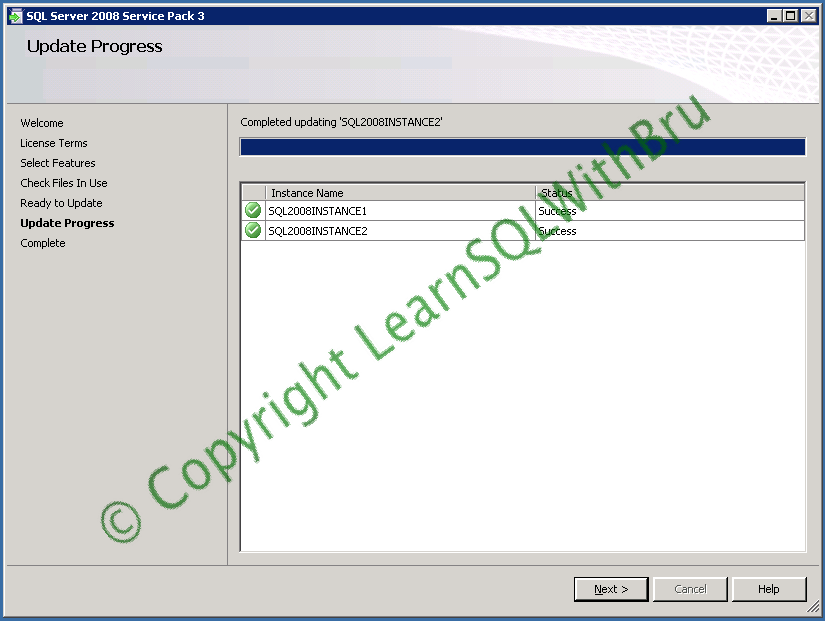
Once the Installation is done, the installation progress is displayed as below.

Click Next to proceed.

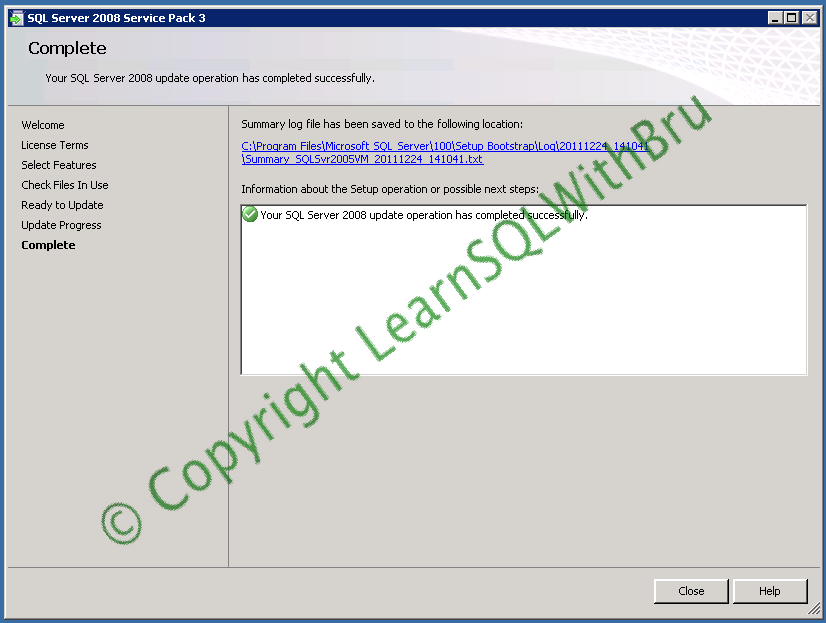
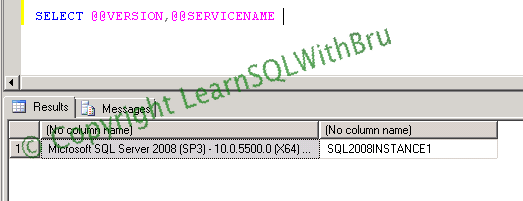
Click Close to close the Service Pack Installer. Restart the machine if possible, else the SQL Instance(s) that have been updated with the Service Pack 3. Once the Instance is restarted, you can run the below command to find the Service Pack level of the SQL Server Instance that you have applied Service Pack..

SELECT @@VERSION,@@SERVICENAME

You can see that the result shows (SP3).

Do you like this site? Like our FB page @ Facebook.com\LearnSQLWithBru so that, you know when there is a new blog post.

— Bru Medishetty