Directory naming convention in SQL Server

In this blog we shall take a look at the naming convention of SQL Server Instance directories since SQL Server 2005. By default, SQL Server is installed in C:\Program Files\Microsoft SQL Server directory. The Instance directory is then created depending on the SQL Server Version that is installed. For each SQL Instance installed, there would be a separate directory for that Instance, all the binary files of that instance are stored in that directory.

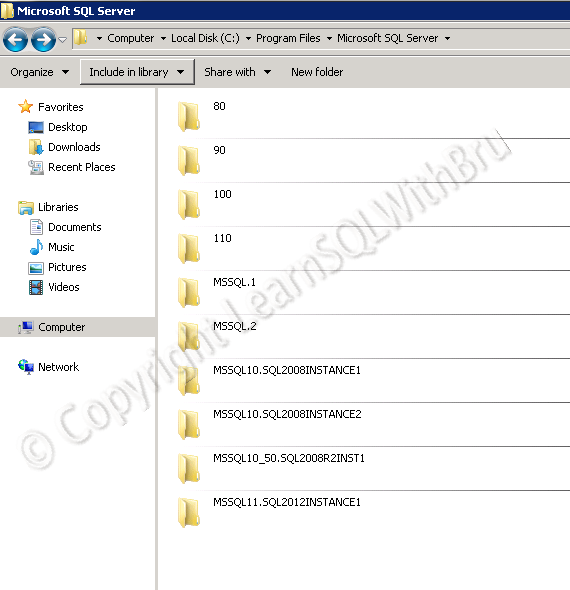
In SQL Server 2005, the instance directories are named as MSSQL.1, MSSQL.2, MSSQL.3 and so on as new Instances are installed. This is inconvenience to find the instances by looking at the naming of these directories. See below that there are 2 directories MSSQL.1and MSSQL.2 one of them being a default instance and the other one is obviously a named instance.

Where as starting from SQL Server 2008, the naming of the directories has been changed to reflect the Instance they belong to. Instance directory names in SQL 2008 start with MSSQL10. followed by the instance name. See that there are 2 directories named MSSQL10.SQL2008INSTANCE1 and MSSQL10.SQL2008INSTANCE2. 

This naming convention has continued in the next releases of SQL Server, such as SQL 2008 R2 (which is often referred as 10.5) hence the naming is MSSQL10_5.xyz and finally in SQL Server 2012, the Instance directory is named as MSSQL11.xyz…

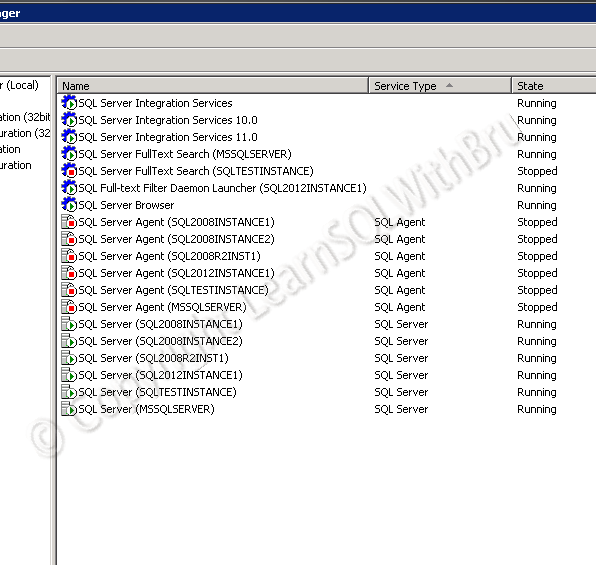
Finally this is how the SQL Server configuration Manager looks like on the server. There are total of 6 SQL Server Instances as you can see.

Do you like this site? Like our FB page @ Facebook.com\LearnSQLWithBru so that, you know when there is a new blog post.

— Bru Medishetty

Start SQL Server Agent from SQL Server Management Studio

In this blog post we shall learn how to start a SQL Server Agent from SQL Server Management Studio. 

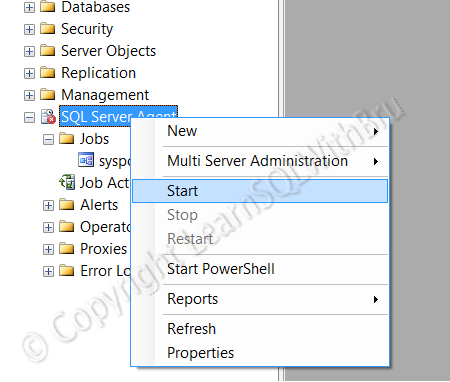
First connect to the SQL Instance using SSMS, then inside Object Explorer, collapse the tree view on the SQL Server. Right click on the SQL Server Agent and from the popup menu item, choose Start.

Do you like this site? Like our FB page @ Facebook.com\LearnSQLWithBru so that, you know when there is a new blog post.

–Bru Medishetty

Getting started with SSDT – SQL Server Data Tools

If you are looking for BIDS (Business Intelligence Development Studio) in SQL Server 2012, then you will not find it. It is replaced with SQL Server Data Tools (SSDT) in SQL Server 2012. In this blog we shall take a sneak peek at how to open SSDT and create a new project.

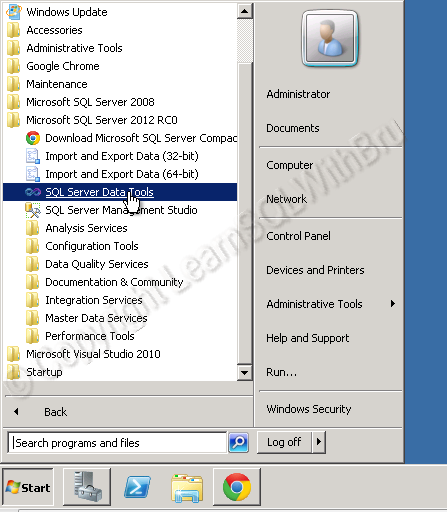
Go to start -> Microsoft SQL Server 2012 (in this case it is RC0), but in final release, it will not be there, so I mentioned the general term.  If you have chosen to to Install SSDT while installing SQL Server 2012 on the machine, you should see SQL Server Data Tools as shown below. Click to open SSDT.

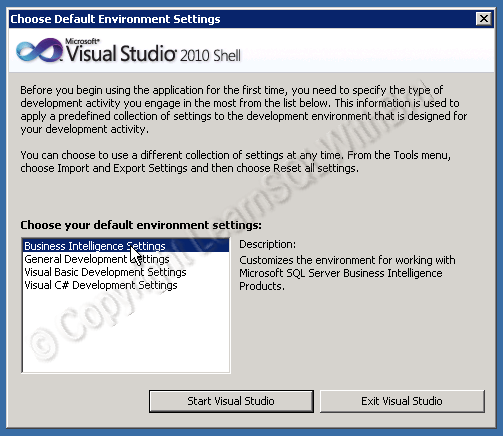
When you are using SSDT for the first time, this screen is displayed, where you are requested to choose which Environment settings would you be using. Select Business Intelligence Settings as shown below and click, Start Visual Studio.

In order to create a new Project click on New Project as shown below.

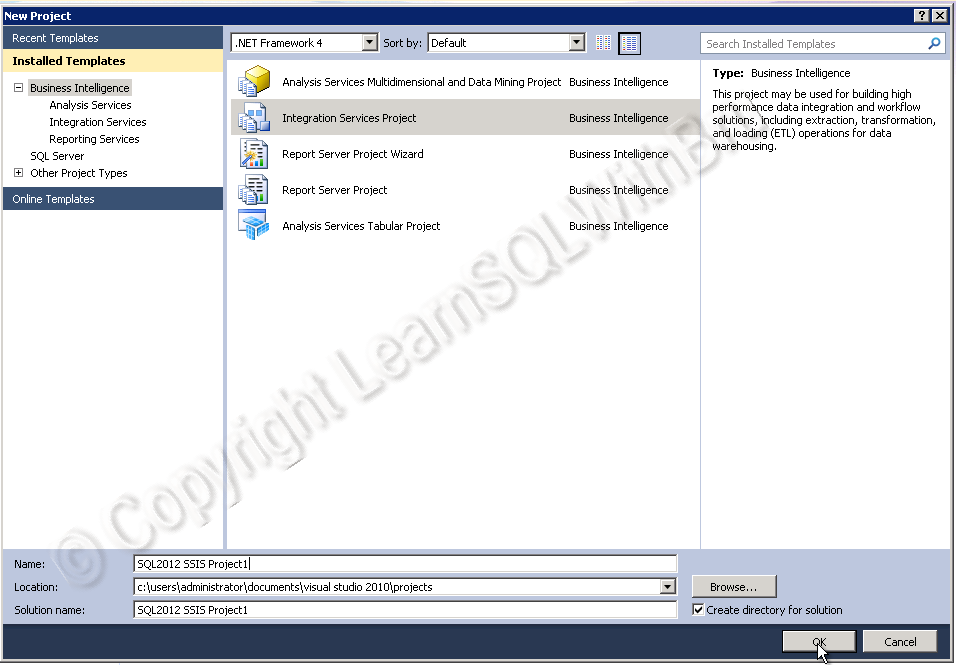
Then, a new Project dialog box appears where you can select what kind of Project that you would like to create. Once you have selected the type of project, you can enter the name of the project and click OK to start creating your choice of project.

Do you like this site? Like our FB page @ Facebook.com\LearnSQLWithBru so that, you know when there is a new blog post.

— Bru Medishetty