SQL Server fails to Start-Troubleshooting the failure

Many times I see people asking in forums about SQL Server not started and how to troubleshoot the reasons for the failure to start the SQL Server.

This video explains the steps to troubleshoot the failures and find the error of a SQL Server startup failure. 

YouTube Preview Image

As always, you can give your feedback as an email to me (bru@learnsqlwithbru.com) or thru comments.

Do you like this site? Like our FB page @ Facebook.com\LearnSQLWithBru so that, you know when there is a new blog post.

–Bru Medishetty

Retrieving data from a Database Snapshots in SQL Server

I wrote a blog earlier, on Database Snapshots which explained about Database Snapshots, steps to create Database Snapshots and some points to remember when working with them. Before continuing reading this blog, I would recommend you read that blog here… Introduction to Database Snapshots in SQL Server

In this blog we shall look at a simple task of restoring data from a Database Snapshots in case if a table is deleted accidentally.

I would recommend you to use the scripts that are available in the earlier blog mentioned above to create the database snapshot and the tables used in this blog. We start this process by dropping a table and assume that, this has happened as an unforeseen event (accidentally dropping a table, in other words, dropping a table instead of dropping an actual one).
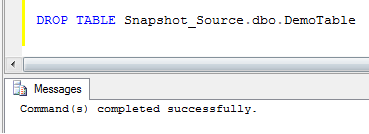
Once that table is dropped, our next step is to create the same table and bring in the data from one of the most recent Database Snapshots. In order to do this I am using the SELECT INTO statement as shown below.
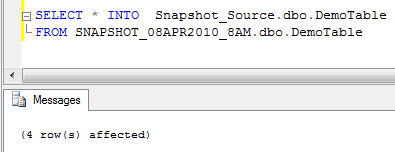
To confirm whether or not the table has got the data back, we run the SELECT command on the table we created and populated data, in the previous step.
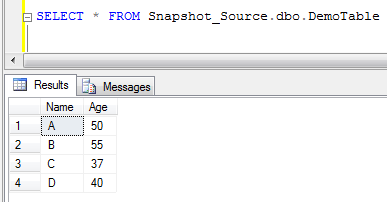
In this way Database Snapshots can also be used an alternate mechanism of Disaster Recovery for unforeseen events such as accidental dropping, truncating or updating of data.

*** Note: You cannot retrieve entire data from a database snapshot table, since it contains only the data in the table at the point of creation of the database snapshot. Any new data that has been inserted, updated, modified or deleted after the creation of the database snapshot cannot be retrieved.

Do you like this site? Like our FB page @ Facebook.com\LearnSQLWithBru so that, you know when there is a new blog post.

–Bru Medishetty

Choosing how the query result are displayed

When working in Query Editor of the SQL Server Management Studio, you can choose how to display the query results. There are 3 different ways to choose from and each of them has its advantage. You can choose/ switch the display format from the standard toolbar of the Management Studio by selecting the required format icon. The 3 icons to choose from are highlighted in the image below.

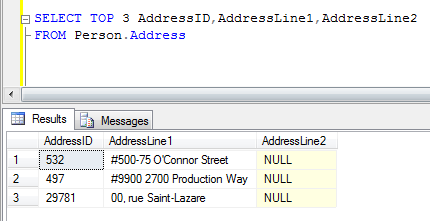
By default,  query results are displayed in Grid format. Choosing this display format is in a way more convenient than other formats since the result-set displayed is tabular format which is easy to understand, the columns can be re-sized in order to fit the screen and more importantly the entire result-set or part of it can be copy pasted to an excel sheet for more analysis or ad-hoc reporting purpose. A sample image is displayed below. To switch from other format to Grid format press Ctrl + D.

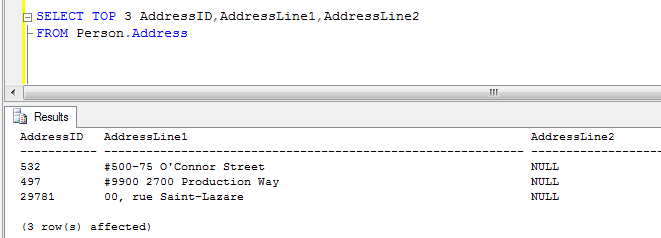
To make the results displayed in text format press Ctrl + T. Switching from one result format to other format will be effective from the next time query is executed. The below image shows the results in a text format, the downside of this format is the columns in the result-set are displayed according to their actual column width and causing a wider display of the results than desired and the columns cannot be re-sized.

To switch from other format to Grid format press Ctrl + Shift + F.

This way of having the result-set might not be a desired option for immediate viewing of the results, but this can be used when the output needs to be saved in a text format for future reference or to attach the result-set as an email attachment. When the query is executed, a dialog box is opened in order to choose the location of the file to be created. By default the files are report file with “.rpt” extension, you can choose a different extension also.

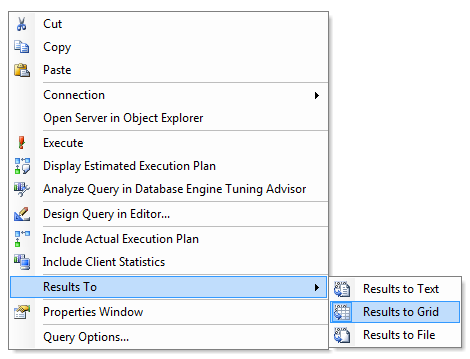
There is another way to switching / selecting the results format. Right click in the query editor, from the pop up menu, go to Results To and choose the desired format as shown in the image below.

Do you like this site? Like our FB page @ Facebook.com\LearnSQLWithBru so that, you know when there is a new blog post.

— Bru Medishetty