SSIS – Creating a new folder and deploying package in that folder

In this blog we shall learn how to create a folder in MSDB using SSMS and deploying a package in that folder. This would be beneficial when there are a large number of SSIS packages deployed on your SSIS Server. Having separate folders enables you to keep all SSIS packages related to a specific group / department as one group and makes it easier for managing them.

Creating a folder

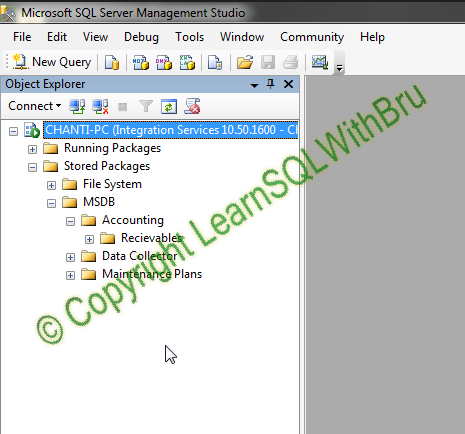
First connect to the SSIS instance using SSMS. Expand the node Stored Packages and then expand MSDB. The below screen shot displays such an example. Note that Accounting folder is expanded to display the list of folders currently available. We would be creating a new folder in Accounting.

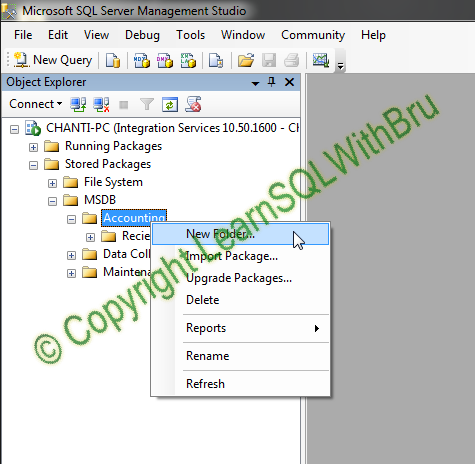
On the folder under which you would like to create a new folder (in this example Accounting folder) right-click and choose New Folder from the pop-up menu.

Create New Folder dialog box is displayed, when you can enter the name of the folder that we would like to create. Click OK to create the folder.

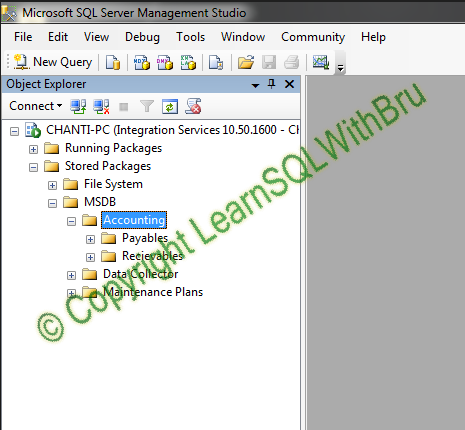
Once the folder is created, you can check in SSMS if you see the folder name under the parent folder.

Deploying the package in a folder

Once you are done with creating the folder, then you can start deploying your SSIS packages to the new folder. For step by step instructions on how to deploy SSIS packages, please read one of my earlier blogs here. In this blog we shall only look at the step that matters.

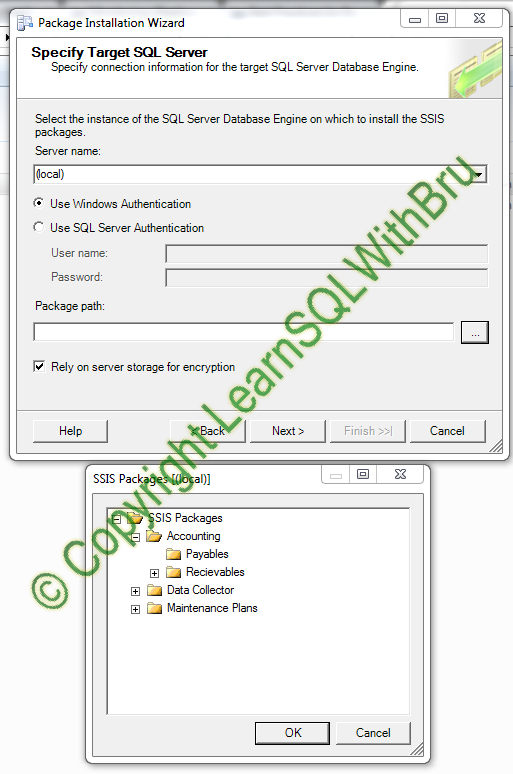
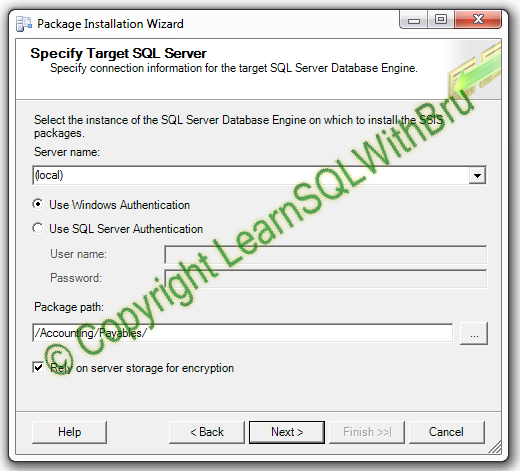
When deploying the package, in the step where you have to choose the SQL Server Target where the SSIS package is to be deployed, type the SQL Server name and then under Package Path, click the ellipses button to display the folder structure of that SQL Server and navigate to the destination folder.

Select that folder and click OK..  

Click Next and continue deployment of the SSIS package.

Do you like this site? Like our FB page @ Facebook.com\LearnSQLWithBru so that, you know when there is a new blog post

— Bru Medishetty

Installing SQL Server 2008 R2 Service Pack 1

This blog will provide a step by step details of installing SQL Server 2008 R2 Service Pack 1. Before installing Service Pack, I would recommend you read one of my earlier blogs Best Practices for applying SQL Server Service Packs.

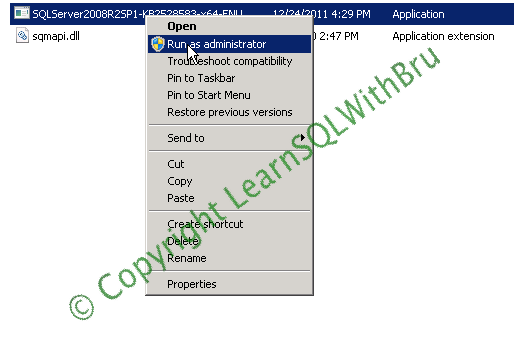
Once you have downloaded the Service Pack 1, copy the .exe file to a local drive and right click on the file and choose Open from the popup menu to begin the installation. (You can alternately double click the file to begin the installation).

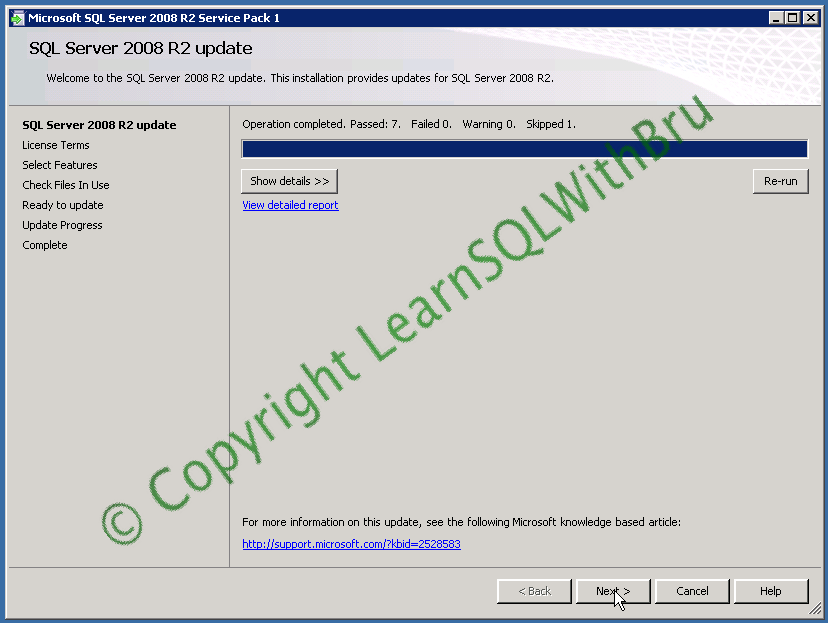
The exe file take a min or two (depending on your system) and extracts to a temporary location, once the extraction is completed, the below screen is displayed and the installer performs few checks and displays the below screen. If there are any failures, ensure that the necessary steps are performed. Click Next to continue installation.

Accept the license terms by selecting the check box. In addition to accepting the license terms, you might chose if you would like Microsoft receive emails about the feature usage on your Instance. Click Next to proceed.

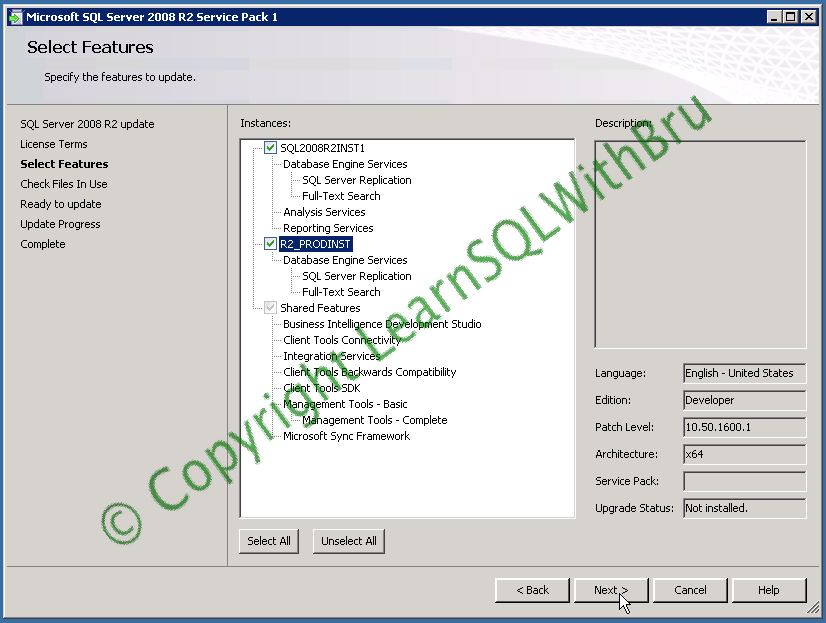
The next step is features selection, where you have to choose the components to which you would like to apply the Service Pack 1. We are going to apply SP1 for 2 instances at the same time. If you have more than 1 SQL 2008 R2 Instances on the machine, you can choose which instance(s) to apply Service Pack. You can select the check boxes beside each of the Instances or if you wish to Install for all Instances / features click Select All button in the bottom left.

You can click on the Instance to see the current details of that Instance / feature. In the picture below, I clicked on the R2_PRODINST and the Edition, Patch Level and other details are displayed..

Click Next after you are done selecting the features to be applied with SP1.

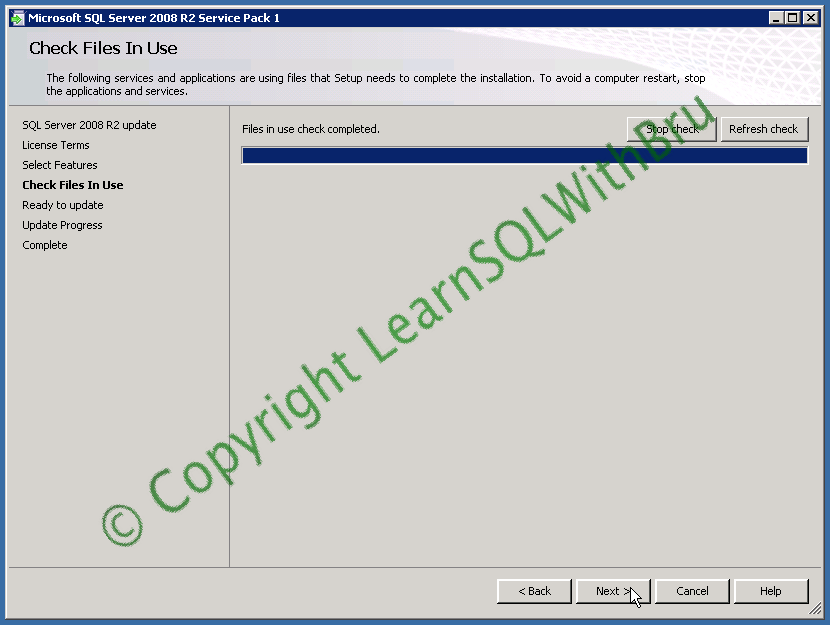
The next step checks for the files / services that are being used currently and lists if there are any files that needs to be stopped in order to avoid a restart. 

Click Next to proceed. Then the below screen is displayed which shows a summary of features that are going to be updated to Service Pack 1. Click Update to start the installation.

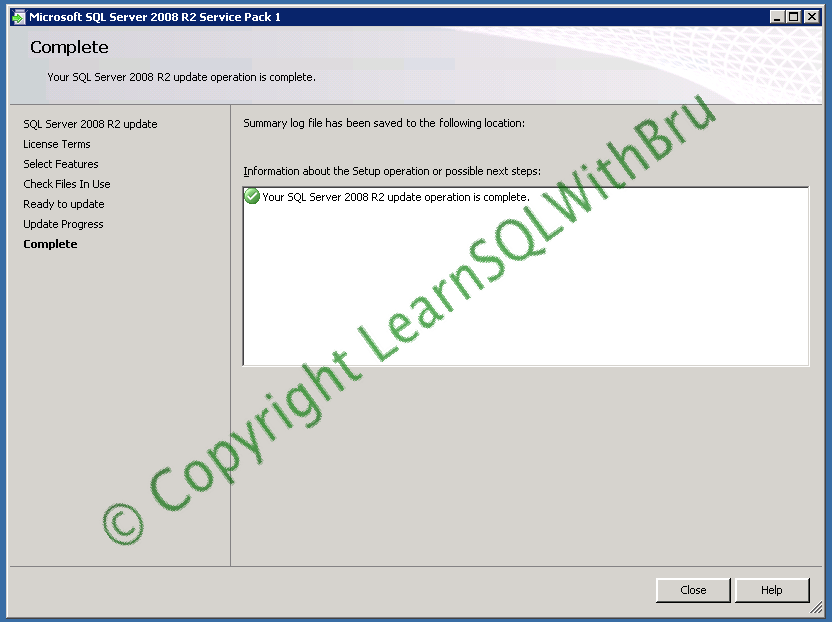
Once the Installation is done, the installation progress is displayed showing the list of Instances / features which were updated.Click Next to continue.

Click Close to close the Service Pack Installer. Restart the machine if possible, else the SQL Instance(s) that have been updated with the Service Pack 1 (in case of multiple instances).

Do you like this site? Like our FB page @ Facebook.com\LearnSQLWithBru so that, you know when there is a new blog post.

— Bru Medishetty

Things to know when Installing SQL Server 2008 R2 side by side with SQL Server 2008

If you are planning to install SQL Server 2008 R2 as an additional Instance on a machine where SQL Server 2008 exists, then you have to keep in mind some implications. Though nothing fatal might occur in the first place, but there would be some changes depending on what settings / features that are selected while Installing SQL Server 2008 R2. 

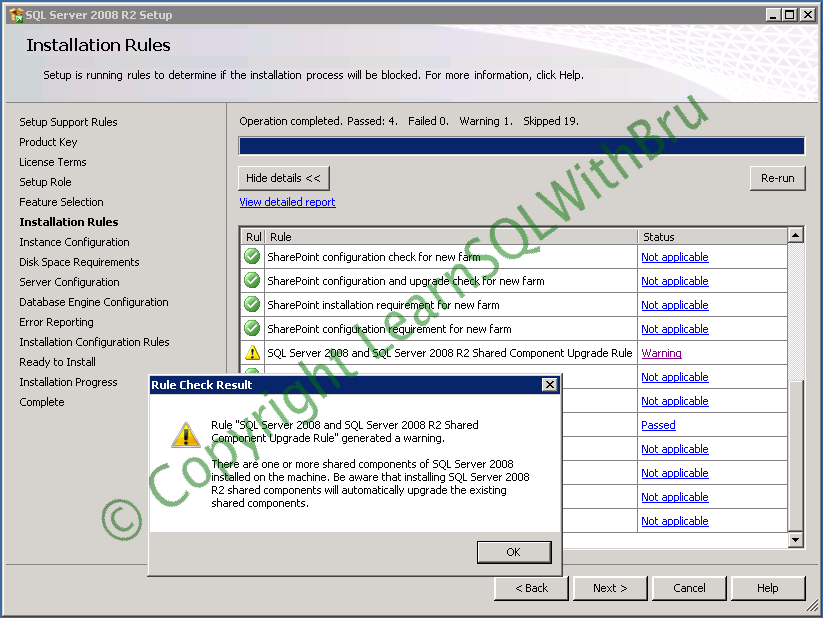
When installing the first instance of 2008 R2, you would come across the below warning message. The message indicates that the Shared Components will be upgraded to SQL Server 2008 R2.

What this means to you is, when you are done performing the installation, the shared components of SQL Server 2008 will not be available any more. Some of the shared components include.. SSMS, BIDS, Profiler, Integration Services, SQL Server Browser etc..

To avoid this scenario, the way out is not to choose Shared Components in the Installation step where you select the features list, that way SQL Server 2008 R2 instance will be installed but the shared components will still be of version SQL Server 2008.

Do you like this site? Like our FB page @ Facebook.com\LearnSQLWithBru so that, you know when there is a new blog post

— Bru Medishetty