Assigning Lock pages in Memory – SQL Server

If you have worked with SQL Server for sometime, you might be well aware of how important is the Buffer Pool for SQL Server performance. If there is a memory pressure on the Server where SQL Server is running, the Windows Operating System might page some portion of the SQL Server Buffer Pool to allocate memory for the other application. When this happens, the SQL Server’s performance is badly impacted depending on how much memory was paged to disk. In order to avoid this, the service account user under which the SQL Server runs, needs to be assigned the permissions Lock Pages in Memory.  This blog will guide the steps to assign the permissions..

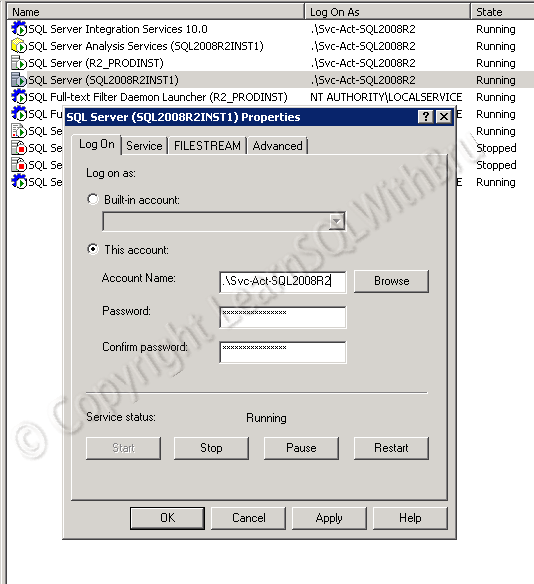
Before we begin, I would like to show you a screens shot of SQL Server Configuration Manager showing the service account under which SQL Servers runs. In my case the service account is Svc-Act-SQL2008R2, so we shall be assigning the permissions to this service account.

With that, lets begin our task….

Fire up Run command by going to Start -> Run or by pressing Windows button and R at the same time. Run command should be displayed as shown below. Type gpedit.msc and click OK.

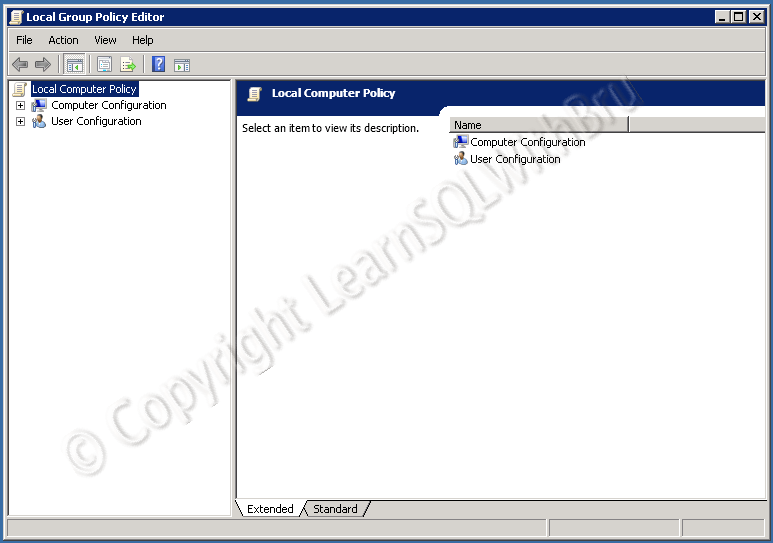
Group Policy Editor is displayed as shown in the pic below …

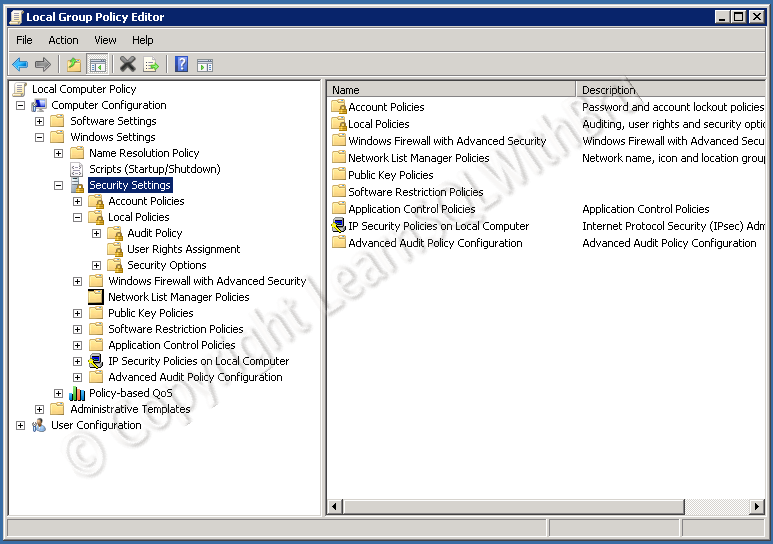
Expand Computer Configuration, and within the list of available groupings, choose Windows Settings and expand it. From the list, now expand Security Settings. the below picture is how it looks after this step.

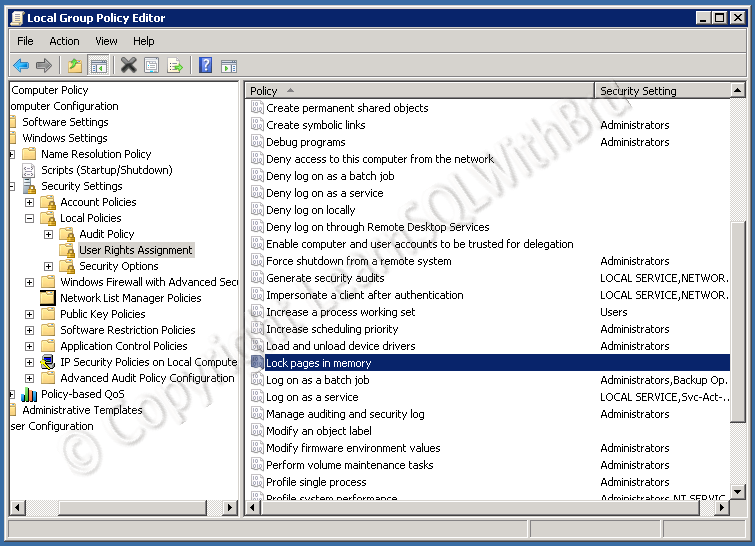
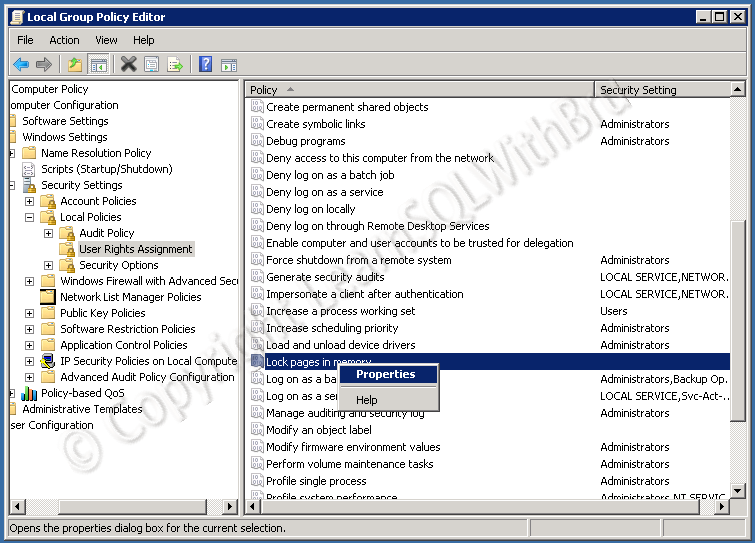
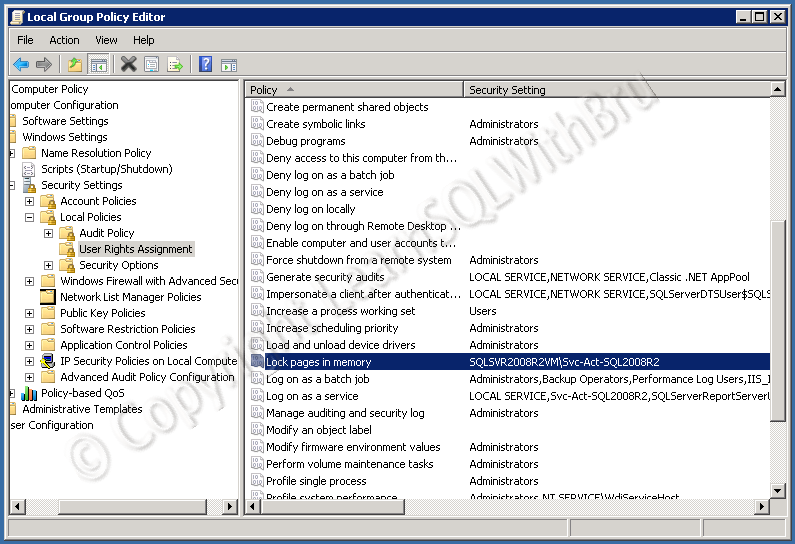
Then expand Local Policies, select User Rights Assignment, you should see a list of policies listed in the right side pane. Scroll down to Lock pages in memory. Pic below…

You can right click on Lock pages in memory and select Properties. You can also double click on Lock pages in memory. In order to show it visually, I chose to right click..

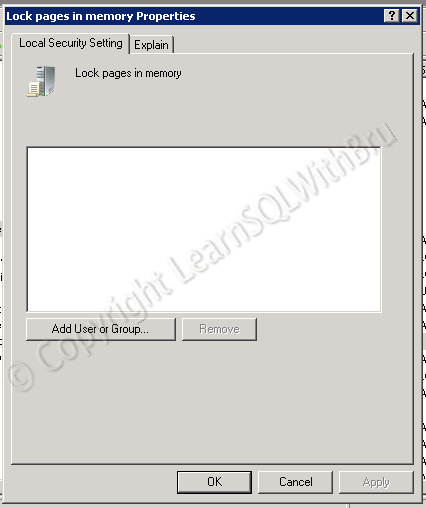
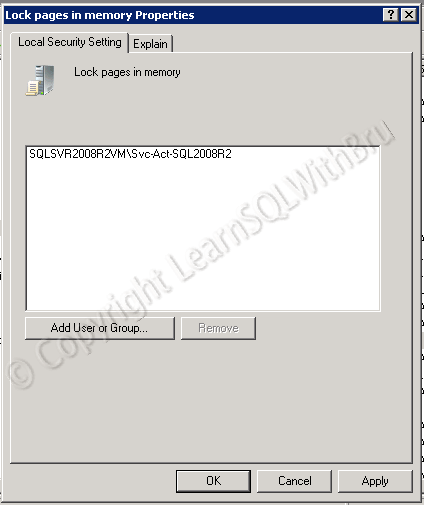
Properties window for Lock pages in memory is displayed as shown below..

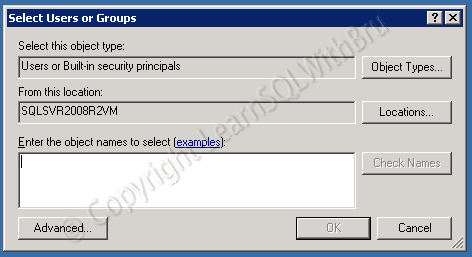
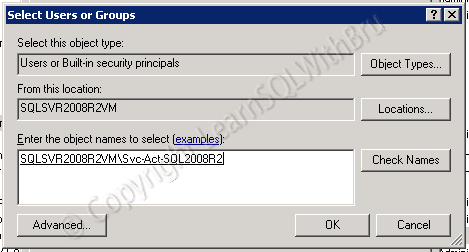
Click Add User or Group button and you should see the below dialog box, we need to select the User(s) or a Group whom we would like to assign this permission.

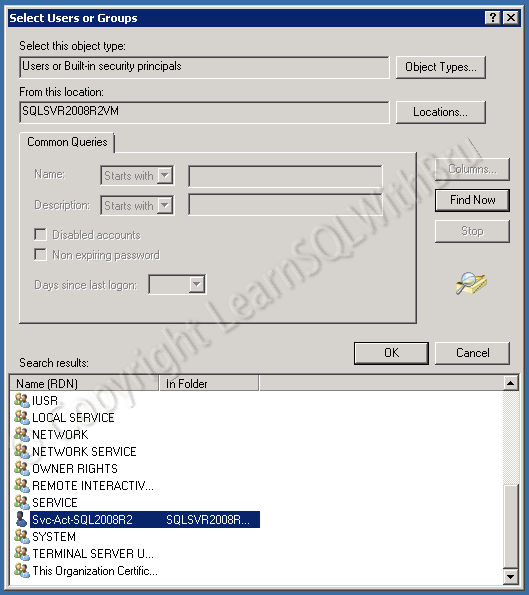
If you are aware of the user account, you can directly type in the username in the text box in the above screen and click Check Names button. To explain in detail, I would like to show the alternate way also.. Click on Advanced button and the dialog box gets maximized with some additional options, click on Find Now button to display the list of users on the machine. Scroll down to the user to select the user, and click OK.

Once you are done with the user selection, the dialog box will display the complete path of user chosen. Click OK

The user(s) is listed in the properties of Lock pages in memory as displayed in below pic…

Click OK to save the permissions and the user name should be displayed in the Local Group Policy Editor as shown below.

You should restart SQL Service for this to take effect, once you have restarted the SQL Server you can see the entry in SQL Server Error Log as shown below..

Do you like this site? Like our FB page @ Facebook.com\LearnSQLWithBru so that, you know when there is a new blog post.

— Bru Medishetty

What should be the File Extension of SQL Server Backups and why?

This looks like a simple question, but I had often seen in many forums this question being asked, I happened to answer a question on SQLServerCentral.com as recently as last week. So I thought why not I write a blog post on this.

What should be the extensions for backup files?

One of the answers is, for our convenience to remember what type of backup is stored with what type of extensions. Most of the time I had worked, seen or heard, it was a general industry wide accepted extension of .BAK for Full backups, .DIFF for Differential and .TRN for transactional (Upper case is not a must, only to highlight the file extension). Doing this way, it would be easier across your team (of 2 or 20) to recognize what is the backup type by looking at the file extension. 

SQL Server does not have problem with the file extension as long as the file is a valid file. You can name your backup as db_full.zip or . sql or any funny extension as you wish and write the backup information into that file. If the backup was completed successfully, you can use that file to restore without any issues..

Why should this be practiced?

Why it should be named using a certain extensions, the reasons are many. The first reason is to quicken you restores, yes the ultimate goal of a backup is to restore your data in case of a failure (user, hardware or a natural disaster). So when you are trying to restore you database from your backups, you would want to know what kind of backup is that backup file just by looking at the extension. As soon as you see that it is a .diff, you know, ok this is my differential backup file. You would not want to waste time by running a restore command against a backup file and then the see a message that this is not the kind of backup the SQL Server is waiting for..

To give you another reason, usually there are exceptions added in your server Anti Virus software so that as soon as it sees certain files with extensions, such as .bak or .diff or .trn, it would not run a virus check, in order to save the disk read / write overhead and the processor usage on the server.

Finally, what if a backup file saved with extension “.jkl” and due to an unrecognized extension the file was deleted by one of your team members. May be that might be the only backup copy and that was deleted…

Remember this.. Being a DBA is to plan for the most unexpected disaster to happen and still be able to get everything covered..

Do you like this site? Like our FB page @ Facebook.com\LearnSQLWithBru so that, you know when there is a new blog post.

–Bru Medishetty

SQL Server Post Installation steps

From time to time, organizations move from an old version to a newer version as the application using the databases keep changing and become more complex. When they move to the newer platform, eventually the database versions have to be migrated / upgraded to the newer version. All these results in setting up a new SQL Server Instance by Installing SQL Server Database and other required services.   

In this blog we shall look at some of the post installation steps performed on a newly installed SQL Server.

  • Check all the necessary Protocols are enabled except VIA (unless you are absolutely sure you need VIA).
  • Make sure that you can connect to the SQL Instance from a remote system. That way you are sure your firewall is not blocking etc..
  • Configure the Backup Compression option on the SQL Instance. (If you intend to use it and your SQL Server Version is 2008 or above)
  • Configure Database Mail.
  • Configure all Backups. (Full, Differential and Log) SQL Server Maintenance Plan is the the quickest way to get started.
  • Make sure the SQL Server Authentication Mode is set to the mode that you wanted, be it Windows Only OR Mixed Mode.
  • Set the minimum and maximum Memory settings for the SQL Instance. Remember that enable AWE is not required for 64 bit servers. (Read blog here…)
  • Assign Lock Pages in Memory to the service account under which SQL Server is running. (Read blog here…)
  • Configure startup modes for SQL Agent, SQL Server Database Engine, Integration Services, Analysis Services, Reporting Services, Full-Text and SQL Browser.
  • Create maintenance plans to manage / purge old backup files.
  • Create linked servers that are required (especially where you are Upgrading / Migrating) (Read blog here…).
  • Recreate the SQL Agent jobs you had on the old SQL Server (if you are doing a Upgrade/Migration).
  • Configure Reporting Services (if install only option was chosen) (read blog here…).
  • Document everything that was performed on that Server, over a period of time you might not remember every step or changes made to that Instance.
Note: All of the above steps might not be necessary in every instance of SQL Server Installation. This is an attempt to make a check list of Post Installation steps..
Update: Links to related posts are added as and when there is a blog post published..
Do you like this site? Like our FB page @ Facebook.com\LearnSQLWithBru so that, you know when there is a new blog post.

— Bru Medishetty