CONCAT – New String Function in SQL Server 2012

CONCAT is a new String function introduced in SQL Server 2012. This function returns an output which is a concatenated string value of the argument values passed in the function. The function would need a minimum of 2 values to be passed.

Let’s take a look at the function. In order to use this function, we shall first create a table and insert few records. The following script is used to the task of creating a table and inserting the data into that table.

CREATE TABLE [dbo].[Customer_Address](
 [CustomerID] [bigint] NULL,
 [Address1] [varchar](50) NULL,
 [Address2] [varchar](50) NULL,
 [ZipCode1] [char](5) NULL,
 [ZipCode2] [char](4) NULL
 )

INSERT INTO Customer_Address
VALUES
(1,'#1','Moon Walk Drive', 24578,2881 ),
(2,'#2','Roof Top Lane', 54856,5421 ),
(3,'#3','Full Thottle Blvd', 90425,5782 ),
(4,'#4','Drive Slow Road', 18854,6502 )

First let us look at the data in the table by doing a Select * on the table. The pic below displays the result set.

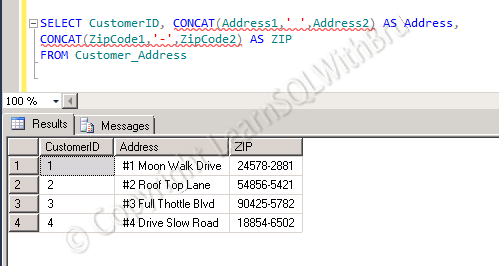
Now let us run the following query which uses the CONCAT function to concatenate the Address1 ad Address2 columns as a single column and also concatenate the 5 character length ZipCode1 and 4 character length Zipcode2 and display a single column output. Note that I am going to use a space ‘ ‘, and a hyphen ‘-‘ in order to display the concatenated column in a meaningful way.

SELECT CustomerID, CONCAT(Address1,' ',Address2) AS Address,
CONCAT(ZipCode1,'-',ZipCode2) AS ZIP
FROM Customer_Address

The below picture shows the result of the query we have just executed.
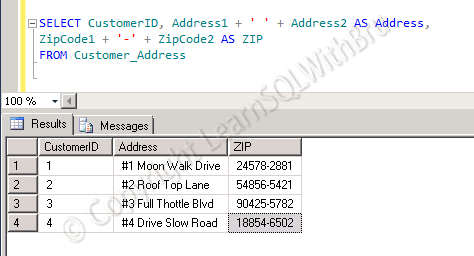
In previous Versions of SQL Server, you could concatenate string values using a +. If order to achieve the same result you can write the following code.

SELECT CustomerID, Address1 + ' ' + Address2 AS Address,
ZipCode1 + '-' + ZipCode2 AS ZIP
FROM Customer_Address

Do you like this site? Like our FB page @ Facebook.com\LearnSQLWithBru so that, you know when there is a new blog post.

— Bru Medishetty

Rules to follow while naming a SQL Server Instance

When planning to install SQL Server on a server, you need to plan ahead about the name of the SQL Server Instance. If you are installing a default instance then this is not necessary. There are certain rules you will have to follow when naming your SQL Instance and lets see what are some of the acceptable names and some non acceptable names for a SQL Server Instance.

Lets start with those names which are not accepted along with some examples….

Reserved Keywords in Microsoft SQL Server are not accepted. You cannot name a SQL Instance as DATABASE or ALTER or CREATE or SCHEMA (of course Capitals Letters does not matter). See the below pic when I try to name the SQL Instance as DATABASE..

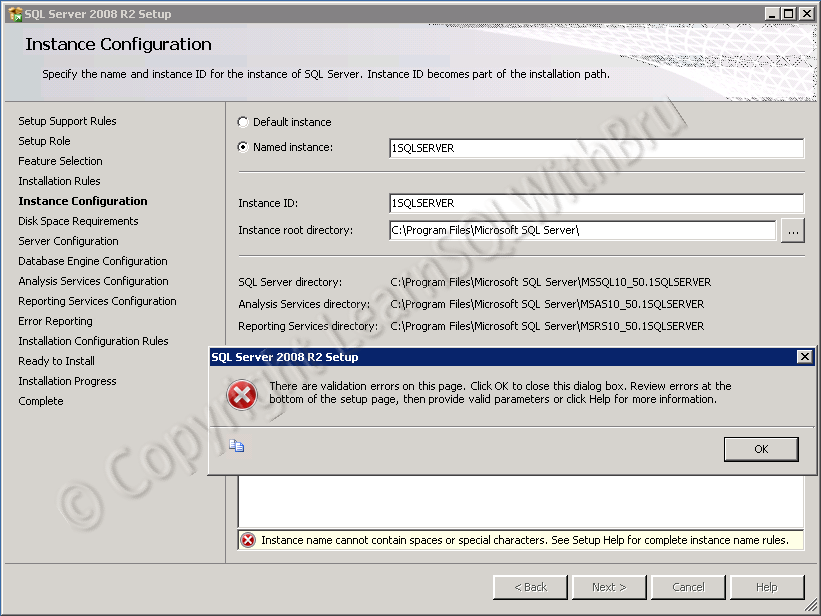
First character should not be a numerical value (0-9), it can be an alphabet (a-z), underscore ‘_’, number sign ‘#’, or ampersand ‘&’. If you try naming a SQL Instance as ‘1SQLServer’, it would not allow you to name with that name. See pic below..

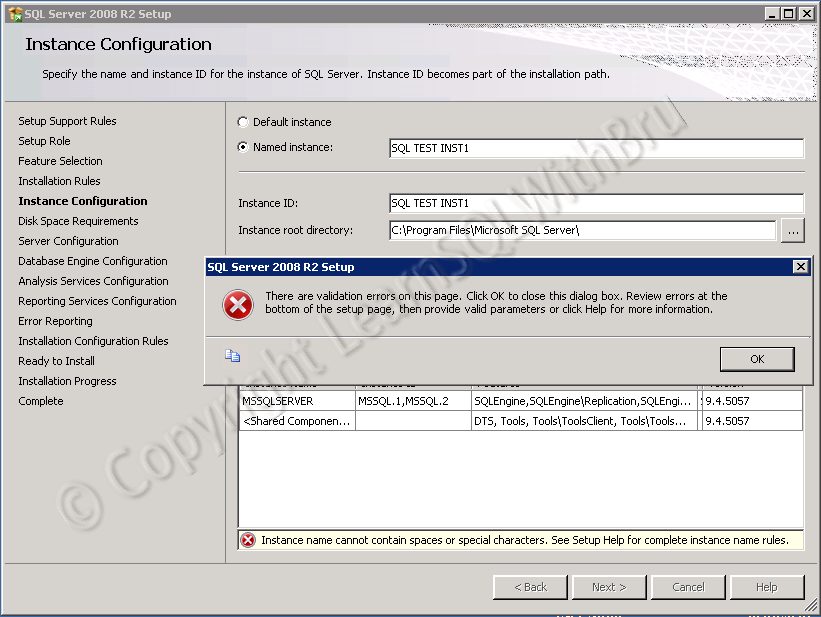
Space and special characters (such as @, ^, *, \ ) are not allowed. That is, if you try naming the instance as “SQL TEST 2”, it is not accepted.

Instance name should be 16 chars or less in length. This is pretty easy to understand, if you want to name the Instance too long, then you have to think again..

As long as they are less than 17 characters, some of the acceptable names can be..

  • SQLServer123
  • SQL_Server_123
  • SQL_Server#123
  • SQL$Server123
Do you like this site? Like our FB page @ Facebook.com\LearnSQLWithBru so that, you know when there is a new blog post.

— Bru Medishetty
How to attach a SQL Server database when ldf (Log) file is missing?

In this blog post we shall learn how to attach a database when the Database Log file is missing. Attaching a database which has all both the data and log files intact, is quite straight forward, you show where the data and log files are residing on your machine and the database will be attached. But when the log file is missing there is a little change to that procedure..

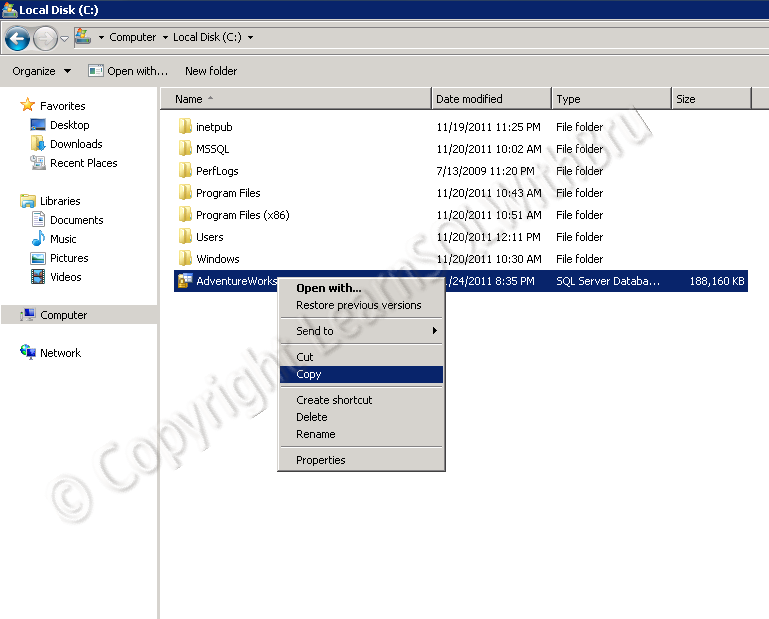
For this example, I downloaded the sample database for SQL Server 2012 from the Microsoft official site for SQL Server sample databases. First lets us place the Primary Data file (.mdf) file in the Data directory of the SQL instance, so I copy the data file (pic below) and paste it in the Data Directory (it might be different on your Server).

The picture below is my Data directory. The reason for placing the mdf file in the data directory is simple, when you try to attach a database, the wizard by default opens the data directory of the SQL Instance. You might also have the mdf file elsewhere, but in the wizard you will have to browse to that location..

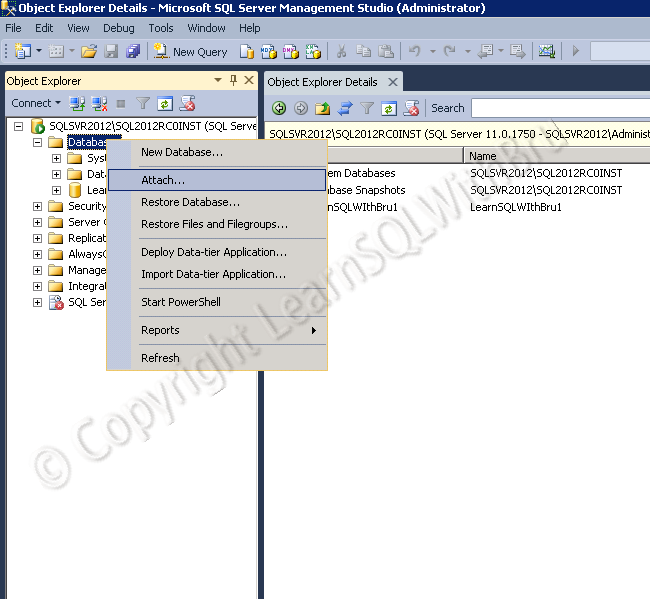
Open the SQL Server Management Studio and connect to the SQL Instance, in the Object Explorer, right click the Databases node and select Attach from the popup menu.

Attach databases wizard is displayed as shown below. Click on Add button..

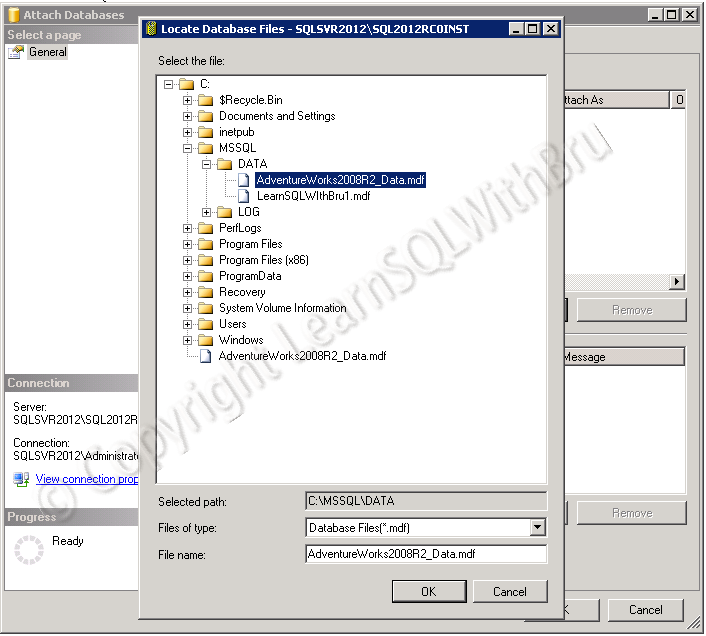
Then the below screen appears where we have to choose the mdf file of the database that we are planning to attach. As mentioned earlier, this locate database files dialog by defaults shows the Data directory of the Instance. If your mdf file is in a different location, you need to expand the folder tree to locate the file. Once the file is located, select the file and click OK button.

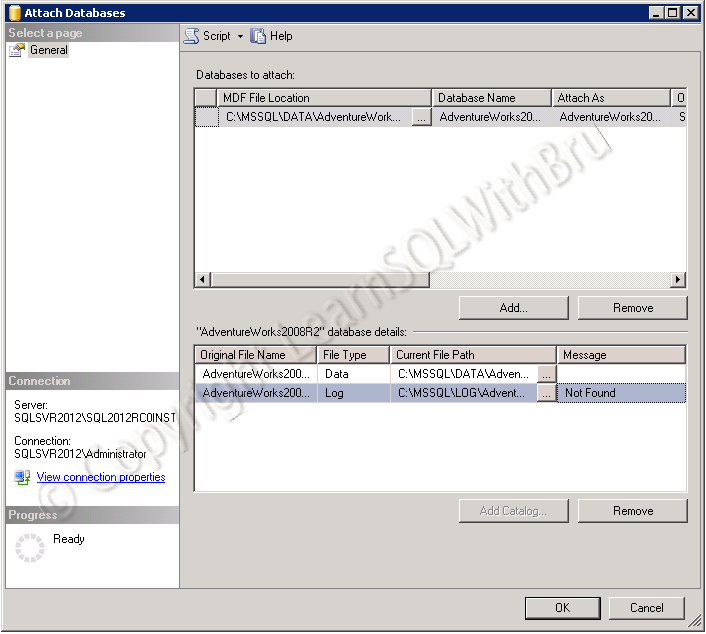
The wizard will then display the details of the database being attached, and note that the wizard is expecting a Log file (.ldf) in the log directory of the SQL Instance. Since it did not find any file in that directory the Message is displayed as Not Found. In the bottom portion of the window, select the row that displays the info about the log file. Click Remove button in the bottom right of the window.

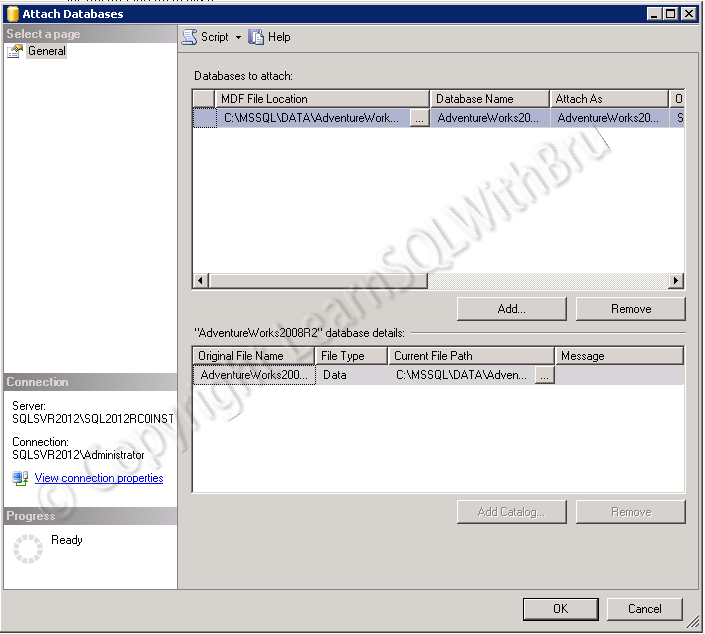
After you removed the row, the window should look like the one shown in the pic below. Now click OK to attach and create the database.

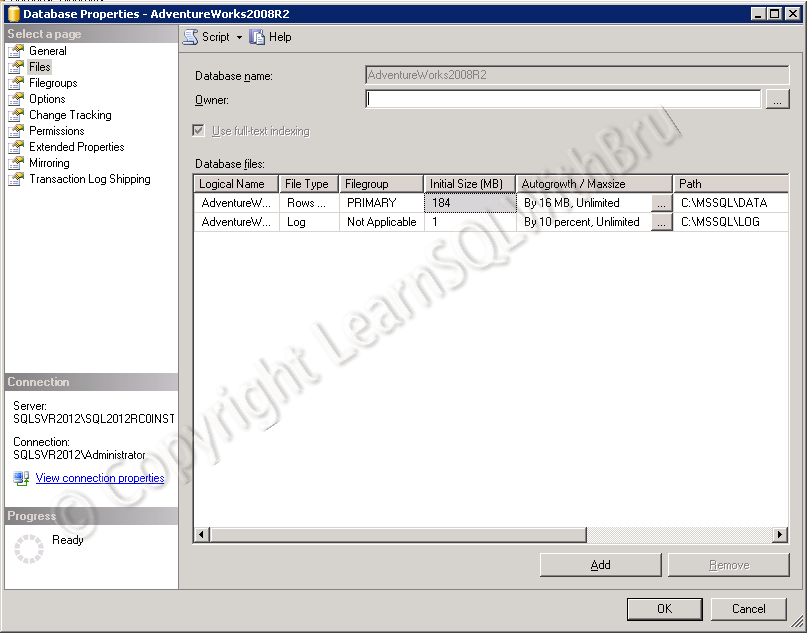
Once the database is attached, right click the database and choose Properties and you click the Files page on the left side. You should see the database file of the database that was attached. See that the Log file is created with default database settings.

Do you like this site? Like our FB page @ Facebook.com\LearnSQLWithBru so that, you know when there is a new blog post.

— Bru Medishetty