Introduction to Database Snapshots in SQL Server 2005

Database Snapshots is a new feature introduced in SQL Server 2005. It provides a mechanism that enables us to save an exact read only copy of a database when the snapshot was taken. It would be highly beneficial that a database snapshot is taken when certain bulk changes to the table data is made or you need to maintain an exact copy of your database as it was at the end of the day, each day.

Some points to be noted while working with Database Snapshots.

Database snapshot can be created using T-SQL script only, it cannot be implemented using the Management Studio.

  • Database snapshot of a database should exist on the same SQL Instance as the Source Database. Why this is so would be beyond the point of discussion for this article, so I would explain in another blog soon.
  • Database snapshots cannot be backed up. (But in the Object Explorer you will see that the menu options are available to backup)
  • Database snapshot cannot be updated or modified (That is why it is referred as read only Copy)
  • It is available only in Enterprise Edition of SQL Server 2005.

Script to create the Source Database

USE [master]
GO

CREATE DATABASE [Snapshot_Source] ON PRIMARY

( NAME = N'Snapshot_Source_Data', FILENAME =
N'D:\Snapshot_Source_Data.mdf' , SIZE = 4096KB,

MAXSIZE = UNLIMITED, FILEGROWTH = 1024KB )

LOG ON

( NAME = N'Snapshot_Source_log',
FILENAME = N'D:\Snapshot_Source_Log.ldf' ,

SIZE = 1024KB , MAXSIZE = 2048GB , FILEGROWTH = 10%)

GO

Creating table called DemoTable using the following script

CREATE TABLE [Snapshot_Source].[dbo].[DemoTable](

[Name] [varchar](50) NULL,

[Age] [int] NULL )

ON [PRIMARY]

Inserting records in the DemoTable

INSERT INTO [Snapshot_Source].[dbo].[DemoTable]

VALUES ( 'A' , 30 )

INSERT INTO [Snapshot_Source].[dbo].[DemoTable]

VALUES ( 'B' , 35 )

INSERT INTO [Snapshot_Source].[dbo].[DemoTable]

VALUES ( 'C' , 37 )

INSERT INTO [Snapshot_Source].[dbo].[DemoTable]

VALUES ( 'D' , 40 )

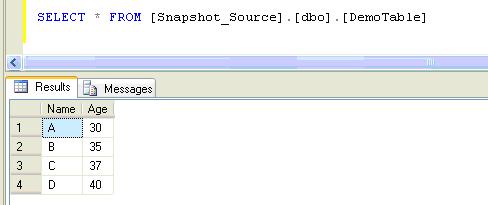
Run the following script in the Query Editor

SELECT * FROM [Snapshot_Source].[dbo].[DemoTable]

CREATE DATABASE SNAPSHOT_01OCT2009_6AM ON PRIMARY

( NAME = N'Snapshot_Source_Data',

FILENAME = N'D:\SNAPSHOT_01OCT2009_6AM.ss' )

AS SNAPSHOT OF Snapshot_Source;

GO

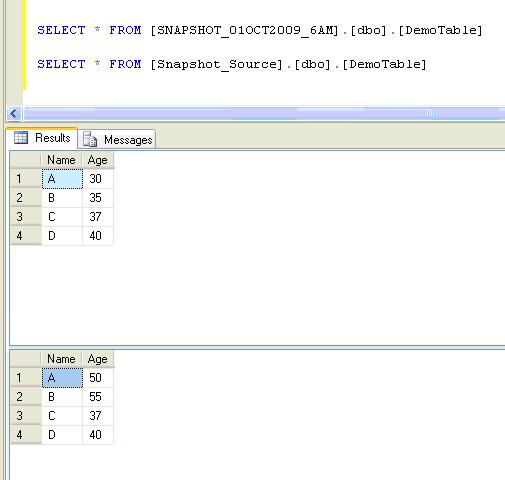
Modifying the Data in the Source Database

Let’s modify the data in the source database by the following update statements.

UPDATE [Snapshot_Source].[dbo].[DemoTable]

SET [AGE] = 50 WHERE [Name] = 'A'

UPDATE [Snapshot_Source].[dbo].[DemoTable]

SET [AGE] = 55 WHERE [Name] = 'B'

Verifying the data at the source database and also from the snapshot by running the following script in the Query Editor.

SELECT * FROM [SNAPSHOT_01OCT2009_6AM].[dbo].[DemoTable]

SELECT * FROM [Snapshot_Source].[dbo].[DemoTable]

You can use a database snapshot in situations which needs a continuous read only copy of the database at a point of time. For example, you have a reporting application which requires data to be available and it is ok to have the data as it was at the end of day yesterday. A scheduled database snapshot of your transaction based Database which runs after the working hours each day would be a good solution.

Dropping a Database Snapshot

Dropping a database snapshot is same as dropping a database, using the Drop Database command.

The following command would delete the database snapshot that was used in this example.

DROP DATABASE SNAPSHOT_01OCT2009_6AM

Do you like this site? Like our FB page @ Facebook.com\LearnSQLWithBru to know when there is new content.

–Bru Medishetty

Database Partitioning in SQL Server 2005

I would like to explain the steps involved in implementing Database Partitioning in SQL Server 2005.  If you had already implemented Very Large Databases using federated Databases, you would be relieved that Database Partitioning is very easy to configure and work with and the pain to maintain is gone with this wonderful feature.

Implementing Database Partitioning involves mainly 3 Steps.

  • Creating a Partition Function
  • Creating a Partition Scheme
  • Creating a Partitioned Table or Index

Creating Database to setup Partitioning

USE [master]
GO

CREATE DATABASE [LearnSQLwithBru] ON PRIMARY

(NAME = N'LearnSQLwithBruData1',
FILENAME= N'D:\LearnSQLwithBruData1.mdf',
SIZE= 3072KB ,MAXSIZE=UNLIMITED,FILEGROWTH= 1024KB ),
FILEGROUP [Filegroup_Sep2009]

(NAME = N'LearnSQLwithBruData2',
FILENAME = N'D:\LearnSQLwithBruData2.ndf',
SIZE= 3072KB ,MAXSIZE=UNLIMITED,FILEGROWTH= 1024KB ),

FILEGROUP [Filegroup_Oct2009]

(NAME= N'LearnSQLwithBruData3',
FILENAME= N'D:\LearnSQLwithBruData3.ndf',
SIZE= 3072KB ,MAXSIZE=UNLIMITED,FILEGROWTH= 1024KB )

LOG ON
(NAME = N'LearnSQLwithBru_log',
FILENAME= N'D:\LearnSQLwithBru_log.ldf',
SIZE= 10240KB ,MAXSIZE= 2048GB ,FILEGROWTH= 10%)

GO

Step 1 :  Creating a Partition Function

You must identify the Column which would be used to partition the Database. In this example I am partitioning the Database using the Datetime Value, so that we can use large Tables / Indexes on those Large tables to use this Partition. There would a good deal of benefit if the Partitioning is used by both a Large Table and the Indexes on that table. To make things better, while creating the Database, consider placing the Data Files in the Filegroups on Different Disk Drives. With or without Partitioning, SQL Server has a better performance when a Database is created with multiple Disk Drives and with Multiple Filegroups.

Follow the Code below to create a Partition Function which is based on a Datetime Values, so this gives you an opportunity to partition all the Large Tables in the current Database to be portioned by the month.

USE LearnSQLWithBru
GO

CREATE PARTITION FUNCTION PF_RangePartition (Datetime)
AS RANGE LEFT FOR

VALUES
('20090930 23:59:59.997',
'20091031 23:59:59.997')

GO

The above script ensures that we are going to create a Partitioning function in which the Range values are used in left justification, so that all the date values left of  “20090930 23:59:59.997” i.e, less than or equal to Sep 30 2009 will be stored as a single range, and then values between Oct 1 2009 to Oct 31 2009 will be stored as separate Range and all the values from Nov 1 2009 will be stored as a Separate range, by SQL Server when implemented later on.

 Step 2 :  Creating a Partition Scheme

The following code creates a Partition Scheme which will bind the partition Function to Separate Filegroups. Note it is not necessary that you need to have multiple partitions, it ensures in better Performance of the Database if implemented with multiple Filegroups.

CREATE PARTITION SCHEME OrderDateRangePScheme

AS PARTITION PF_RangePartition TO
([Filegroup_Sep2009], [Filegroup_Oct2009],
 [PRIMARY] )

The script above ensures that all the tables that are going to be created on this partition, will be physically stored based on the Filegroups mentioned. So the Data which has the values below Sep 30 2009 will all be stored separately on the Filegroup_Sep2009, and the values between Oct 1 2009 to Oct 31 2009 will be stored on the Filegroup_Oct2009, and finally any data that is Greater than or Equal to Nov 1 2009 will be stored on the Primary Filegroup.

Step 3 : Creating a Partitioned Table

In order to create a table which will use the created partitions, we need to mention the partition Name in the create table script as described below.

CREATE TABLE [DBO].[OrderDetails](
[CustomerNo] [INT]NULL, [OrderNo] [NVARCHAR](20)NULL,
[OrderQty] [SMALLINT] NULL, [OrderDate] [DATETIME] NOT NULL)
ON OrderDateRangePScheme (OrderDate)

Inserting Data into the Table

Insert some records in the Table using the following script to check the usage of Partitioning.

INSERT INTO [dbo].[OrderDetails]VALUES(1,'Ord1', 1,'09/1/2009')

INSERT INTO [dbo].[OrderDetails]VALUES(2,'Ord2', 3,'09/5/2009')

INSERT INTO [dbo].[OrderDetails]VALUES(3,'Ord3', 7,'09/10/2009')

INSERT INTO [dbo].[OrderDetails]VALUES(4,'Ord4', 2,'09/30/2009')

INSERT INTO [dbo].[OrderDetails]VALUES(5,'Ord5', 10,'10/1/2009')

INSERT INTO [dbo].[OrderDetails]VALUES(6,'Ord6', 9,'10/10/2009')

INSERT INTO [dbo].[OrderDetails]VALUES(7,'Ord7', 6,'10/20/2009')

INSERT INTO [dbo].[OrderDetails]VALUES(8,'Ord8', 8,'11/30/2009')

INSERT INTO [dbo].[OrderDetails]VALUES(9,'Ord9', 7,'12/1/2009')

INSERT INTO [dbo].[OrderDetails]VALUES(10,'Ord10', 3,'12/10/2009')

INSERT INTO [dbo].[OrderDetails]VALUES(10,'Ord10', 3,'12/15/2009')

INSERT INTO [dbo].[OrderDetails]VALUES(10,'Ord10', 3,'12/20/2009')

INSERT INTO [dbo].[OrderDetails]VALUES(10,'Ord10', 3,'12/25/2009')

INSERT INTO [dbo].[OrderDetails]VALUES(11,'Ord11', 4,'1/20/2010') 

Verifying the Partition Information

Using the sys.partitions view we can check whether the partitions have been storing the records as desired by us.

SELECT * FROM sys.partitions
WHERE OBJECT_NAME(OBJECT_ID)= 'OrderDetails';
GO

 Points to be noted

  • Only Enterprise Edition supports this feature
  • A Partitioning Function can be used by the objects in the same Database.
  • A table can have a Maximum of 1000 partitions.
  • A Partition Scheme can be defined on 1 or more Filegroups. It is not necessary to have multiple Filegroups.

Do you like this site? Like our FB page @ Facebook.com\LearnSQLWithBru to know when there is new content.

— Bru Medishetty