In yesterday’s blog I showed the error when I tried to login to SSRS through Management Studio. I recollected that while installing SQL Server, I chose the option Install only, and I did not configure Reporting Services until now.
So, I decided to write a blog with step by step explanation of how to configure SQL Server Reporting Services. This blog explains the steps to perform on a SQL Server 2012 (as of RC0) and the steps are similar to the steps to configure SQL Server 2008 R2 Reporting Services.
Before configuring SQL Server Reporting Services, ensure that your login has administrator permissions on which the Reporting Services is being configured and also ensure that you have required permissions to create databases (ReportServer databases) on the SQL Server when ReportServer databases will reside.
Go to Start, SQL Server 2012 (RC0 in this case), for other versions of SQL Server choose the appropriate program menu. Go to Configuration Tools and click on Reporting Services Configuration Manager (pic below).

In the next dialog, choose the Server Name and Instance (if more than 1 instance is installed, select the instance from the drop down) and click connect.

Once the Configuration Manager is connected successfully, the Report Server Status is displayed as shown below…. You can see the current status of the Reporting Service and Stop or Start depending on the current status.

Click on Service Account, in the left side pane. The current Service Account setting is displayed. Be default, this would be a service account that was chosen at the point of SQL Server Installation. You can change the service account to another account by choosing Use another account option and enter the username password for that account. I chose to let the Reporting Service run under the service account created during Installation. Once you are done with your choice click Apply button in the bottom of the window.

As soon as you choose apply, few steps are run and the results are displayed as shown in this screen below.

Next, click on web Service URL. The default values are already assigned, and if we decide those vales are good enough, choose Apply to configure with the default values. Instead you can choose a virtual directory of your choose and click Apply when your changes are final.
Note: I am choosing a basic configuration, so I am continuing with default values…

Once the configuration tool configures the virtual directory, the Report Server Web Service URLs are now active and you should be able to click on the URL (in blue font) to open the URL.

Next, click Database. This is the configuration step in which you configure what SQL Instance is hosting the Reporting Services Report databases. Since the databases are not configured, note that the values are blank. Click Database to start configuring databases.

Once you click change database, a new wizard Report Server Database Configuration is displayed as below. In the first screen, there are 2 options, if you would like to create new databases for this reporting service, choose the first option. If you would like to point to an existing report server database, choose the 2nd option. In this case I am going to create new databases for the report server, so I chose that option, click Next to continue…

The next step in the wizard will display the SQL Instance name (if the server has database engine installed), choose the authentication type and click Next.

Enter the database name for the report Server database and click Next.

In the next step, choose the Credentials you would like the report server to use while connecting to the report server database. By default Service Credentials is provided, choose Next to use the Service Credentials.

In the next summary screen verify that all settings, selections are as per your plan and click Next to begin the database creation and configuration step.

Once all the steps are successful, the wizard will display the below screen, click Finish to complete the database configuration.

As the database configuration is completed, you should now see Server Name, database name and other details (as below).

Next click Report Manager URL, This is the step where you can configure the URL for Report Manager. Again this is completely optional, I chose to go with default values, so click Apply.

Once the Report Manager URL is configured, the results section should be displaying the success messages as shown below..

The Next step to configure is E-mail Settings. In this step, you must provide sender email address to be used by the Report Server and provide the SMTP Server information in your case. In this case I do not have SMTP Server configures on my personal Server. I choose to skip this step and not configure any email settings.

In the next step, Execution Account, you will have to provide a domain account (preferably) to be used in case of any credentials are required. The domain account has to have sufficient permissions to access the report items / files. I am not planning to configure this as of this point, so I am skipping this step.

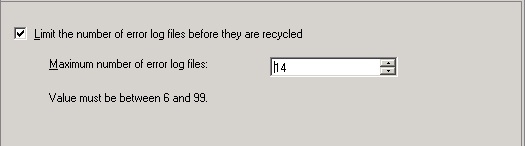
In the next step, Encryption Keys, you have choice to Backup your Reporting Server’s Encryption key to a file, in order to use, in case of migration to another server. In addition to this, if you have create a new Encryption Key or delete the existing Encryption Key ( as and when the situations arise).

The final step in the configuration tool is Scale-out Deployment. This is the step where more than 1 Reporting Services will be utilizing the same Report Databases. You will have to use this step after you finish installing other Reporting Instances and join those instances into the scale-out deployment.

Do you like this site? Like our FB page @ Facebook.com\LearnSQLWithBru so that, you know when there is a new blog post.
— Bru Medishetty