This blog is actually in response to comments to one of my previous blogs Installing SQL Server 2012 Release Candidate 0 posted earlier this week. The user asked the steps to uninstall SQL Server 2012 RC 0, so I thought to write a short blog to help others also, who are looking for steps to uninstall SQL Server 2012, for that matter the steps to uninstall other versions like SQL Server 2008 R2 and 2008 are also very similar to the steps in this blog..
So let us look at the steps to uninstall SQL Server 2012.
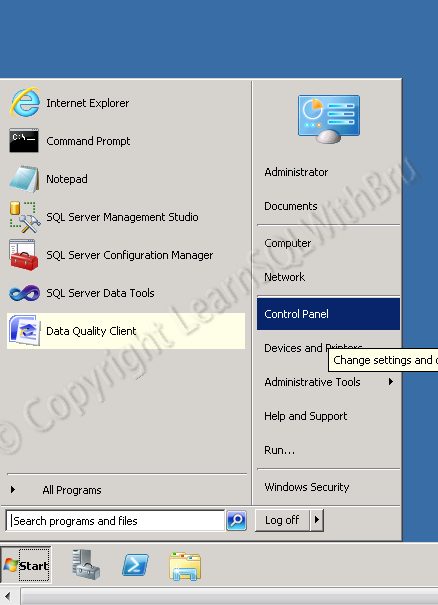
On the machine where SQL Server 2012 is installed (in my case it is Windows Server 2008 R2) clicks Start and select Control Panel.
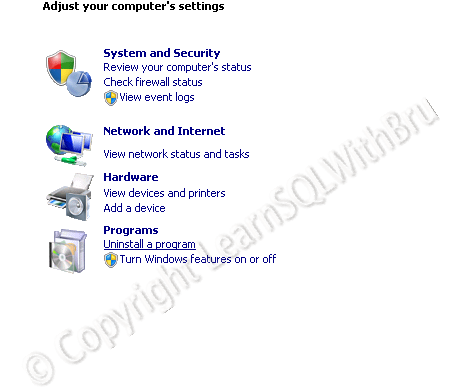
 When control panel is displayed, under Programs section, click Uninstall a program.
 Then the list of programs and features installed on that machine is displayed as below.
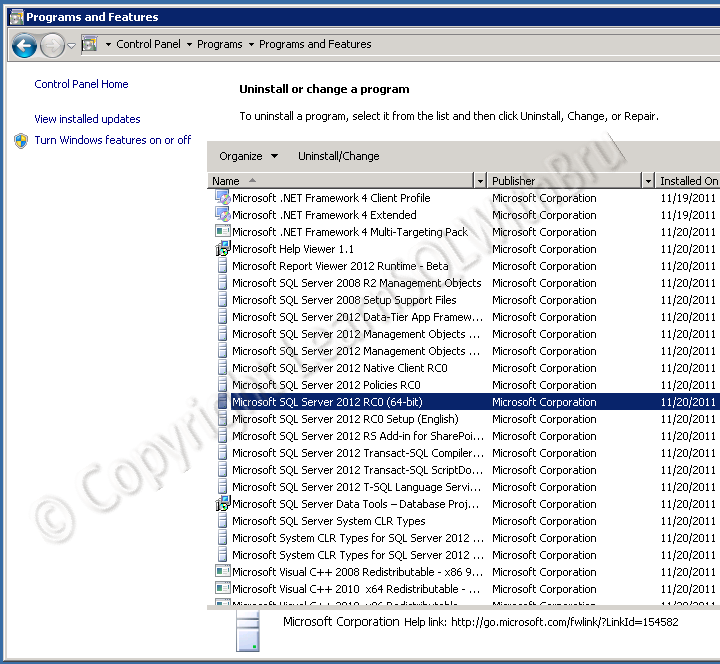 Click on Microsoft SQL Server 2012 RC0 (as mentioned earlier, if you are trying to uninstall SQL Server 2008 or 2008 R2, choose that Version). A small window similar to the SQL Server Installation splash screen is displayed.
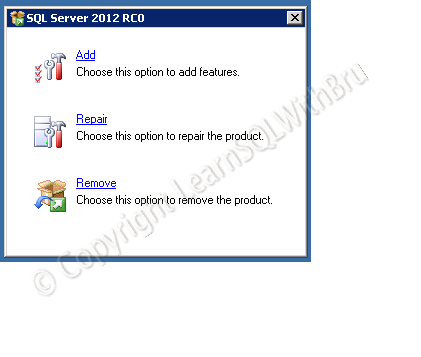 Click on Remove and you should see Setup Support Rules windows displayed which is displayed below.
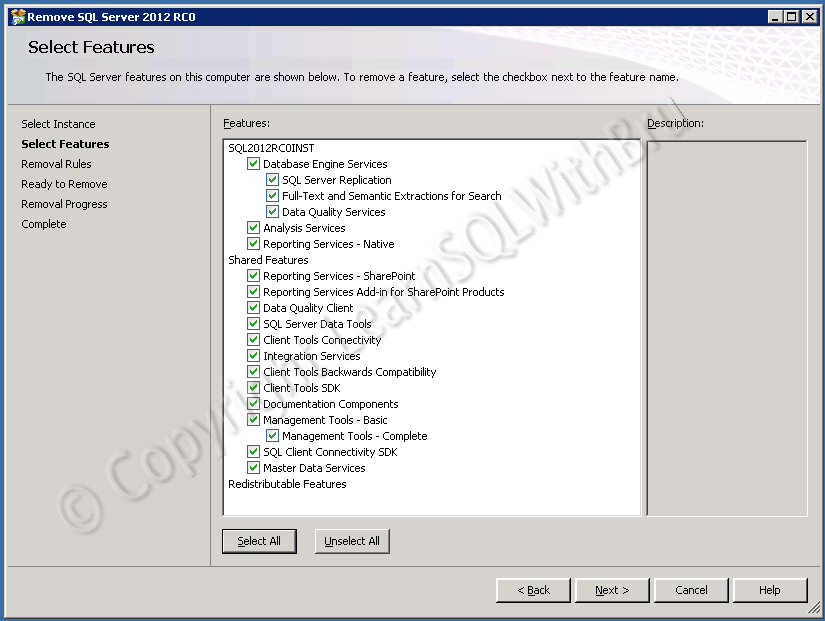
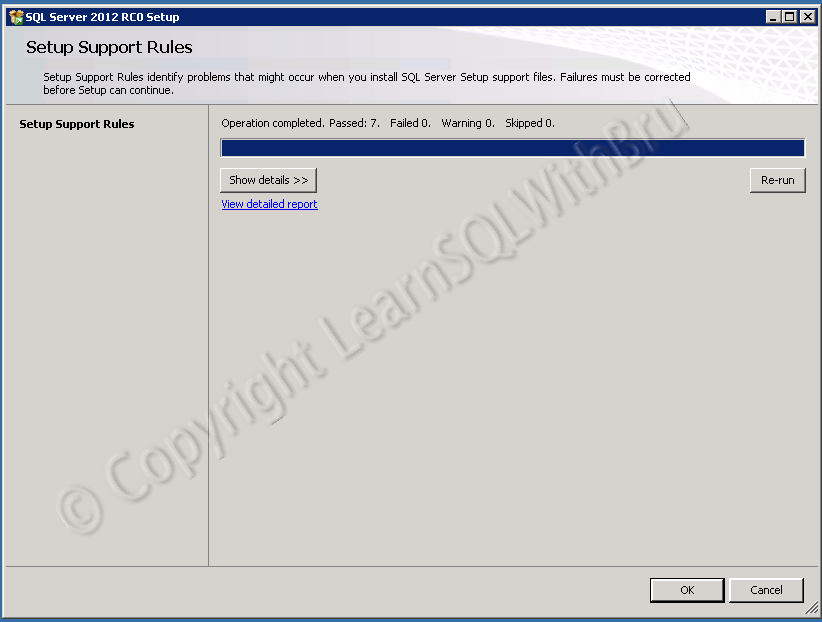 Click OK to proceed. In the next screen Select Instance screen, choose what you want to uninstall from that machine. There will be a drop down displayed from which we need to select the Instance which we want to uninstall now. If there are multiple Instances on that machine, you would need to be careful in choosing which Instance to uninstall. Also, the list of Instances and their Versions (if there are multiple instances) will be displayed in the a grid below for an overall summary of what are on that machine. Once you choose your SQL Server Instance click Next. In the next window (pic below) select the features that you want to install from the machine. Since I wanted to show the steps to uninstall the entire SQL Server 2012 setup, I selected all features. If your machine has other Versions of SQL Server like SQL 2008 or 2008 R2, some of these components should not be uninstalled.
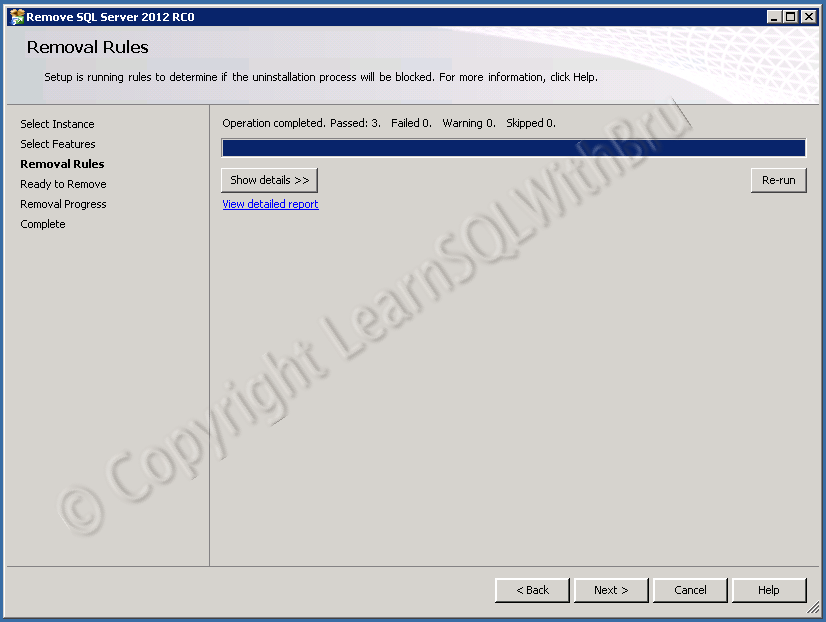
Then, there are some removal checks that are done to make sure the uninstall will run smoothly. If there are no failures, click Next.
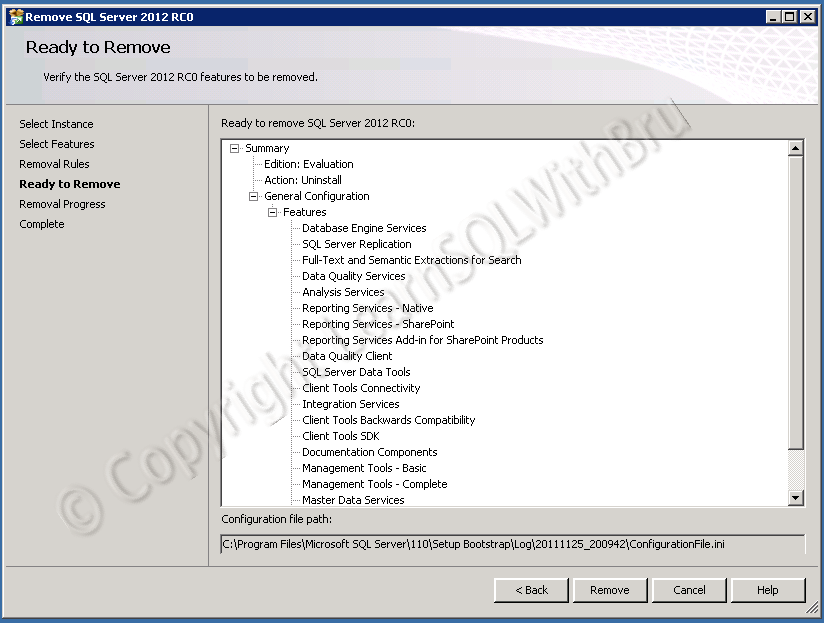 Click Remove to start the uninstall process of SQL Server 2012. You should be seeing the progress window of the SQL Server uninstall. Once the process is completed, there should be a final screen saying that SQL Server is uninstalled. I did not uninstall the SQL Server as I would need it to work on, so I have not shown those 2 screenshots..
Do you like this site? Like our FB page @ Facebook.com\LearnSQLWithBru so that, you know when there is a new blog post.
— Bru Medishetty

